Makapu’u Tide Pools Hike

Makapu’u Tide Pools Hike

Makapu’u Tide Pools Hike

Makapu’u Tide Pools Hike

Makapu’u Tide Pools Hike

Makapu’u Tide Pools Hike

Makapu’u Tide Pools Hike

Bookmark your favorite posts to start a collection. View your bookmarks here »

Lauren swimming in tide pool at makapuu in Oahu Hawaii

One of the most beautiful places to explore on Oahu are the crystal clear tidepools at Makapu’u in Waimanalo. You can hike down from the Makapu’u Point Lighthouse Trail to find these stunning secluded pools and even take a dip if the water is calm!

Hiking Disclaimer:  Hiking can be extremely dangerous and certain hikes may require a certain level of ability – not every trail is a good idea for every person. Please keep your personal fitness and skill levels in mind, and always take proper safety precautions. Many popular hikes in Hawaii are also illegal and could come with hefty fines. Do your research before your adventures to make sure hikes are open to the public and not on private land. Always check weather forecasts and tides if applicable!

Table of Contents

Lauren swimming in tide pool at makapuu in Oahu Hawaii

The Details

The easiest way to get to the Makapu’u Tidepools is by beginning on the Makapu’u Point Lighthouse Trail. About ⅔ of the way up the paved path (at the 3rd rest area), you will see informational signs about Hawaii’s migrating humpback whales. You will have to veer off the paved trail and descend down the side of the mountain to get to the rocky shoreline where the tide pools are located.

Map of Makapuu Parking on Oahu - LAURALOHA TRAVEL

Highlights: There are stunning views of Oahu’s windward coast, including Makapu’u Beach and Koko Head Crater, during the entire hike. The deep blue color of the ocean is unbelievable in this area! The tide pools are stunning and SO much fun to swim in if you plan to go when the conditions are safe.

During winter months (Nov-May), you may even catch a glimpse of humpback whales playing in the ocean just offshore.

Difficulty: 

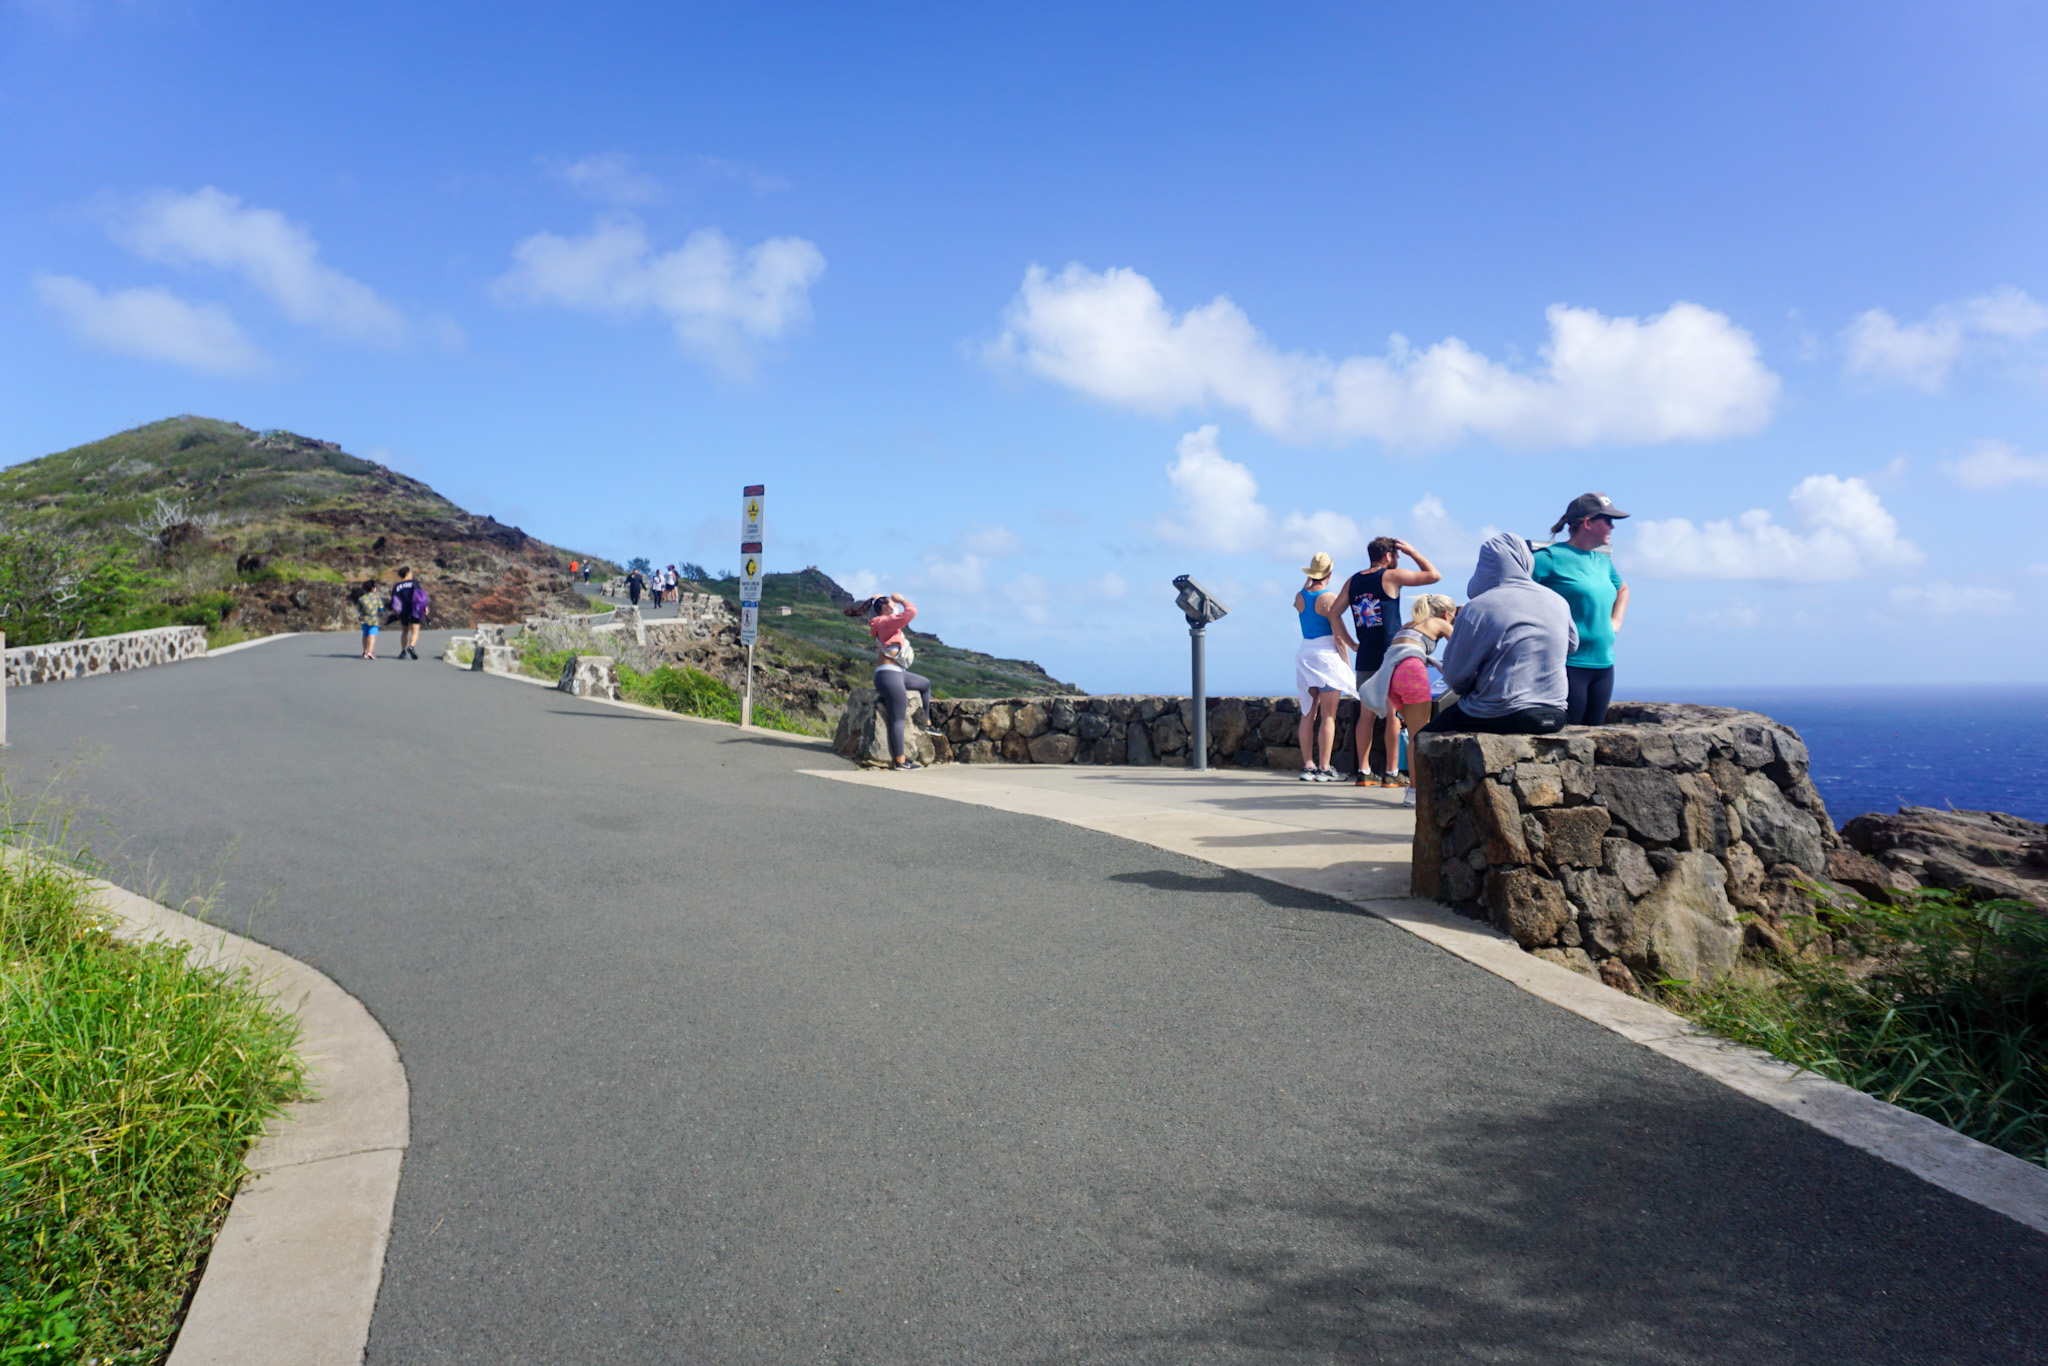
First Half (Paved Lighthouse Trail): Easy to Moderate

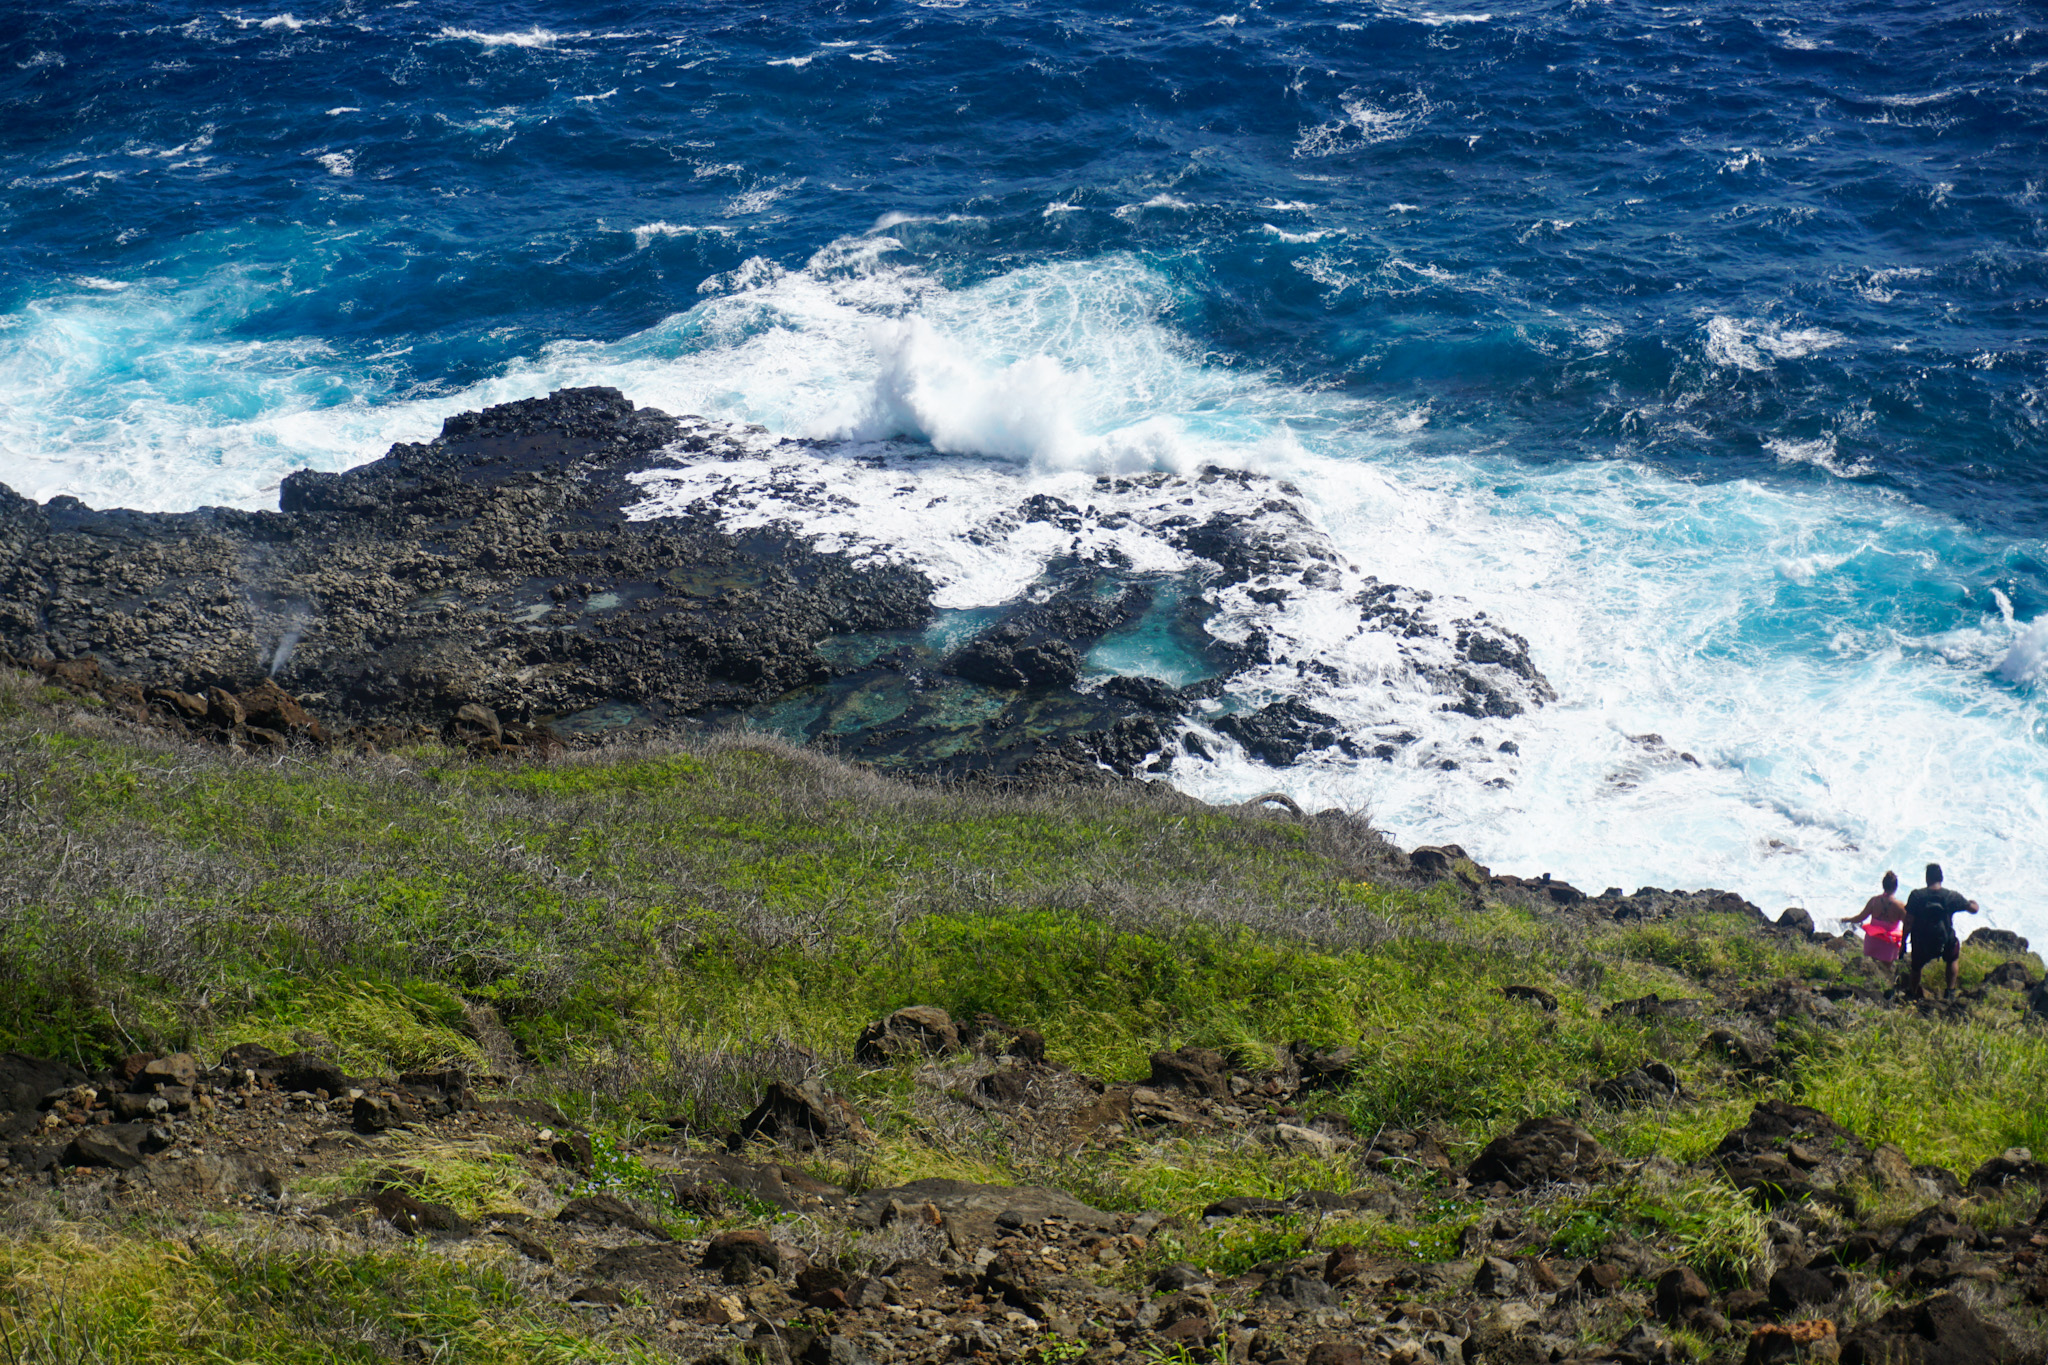
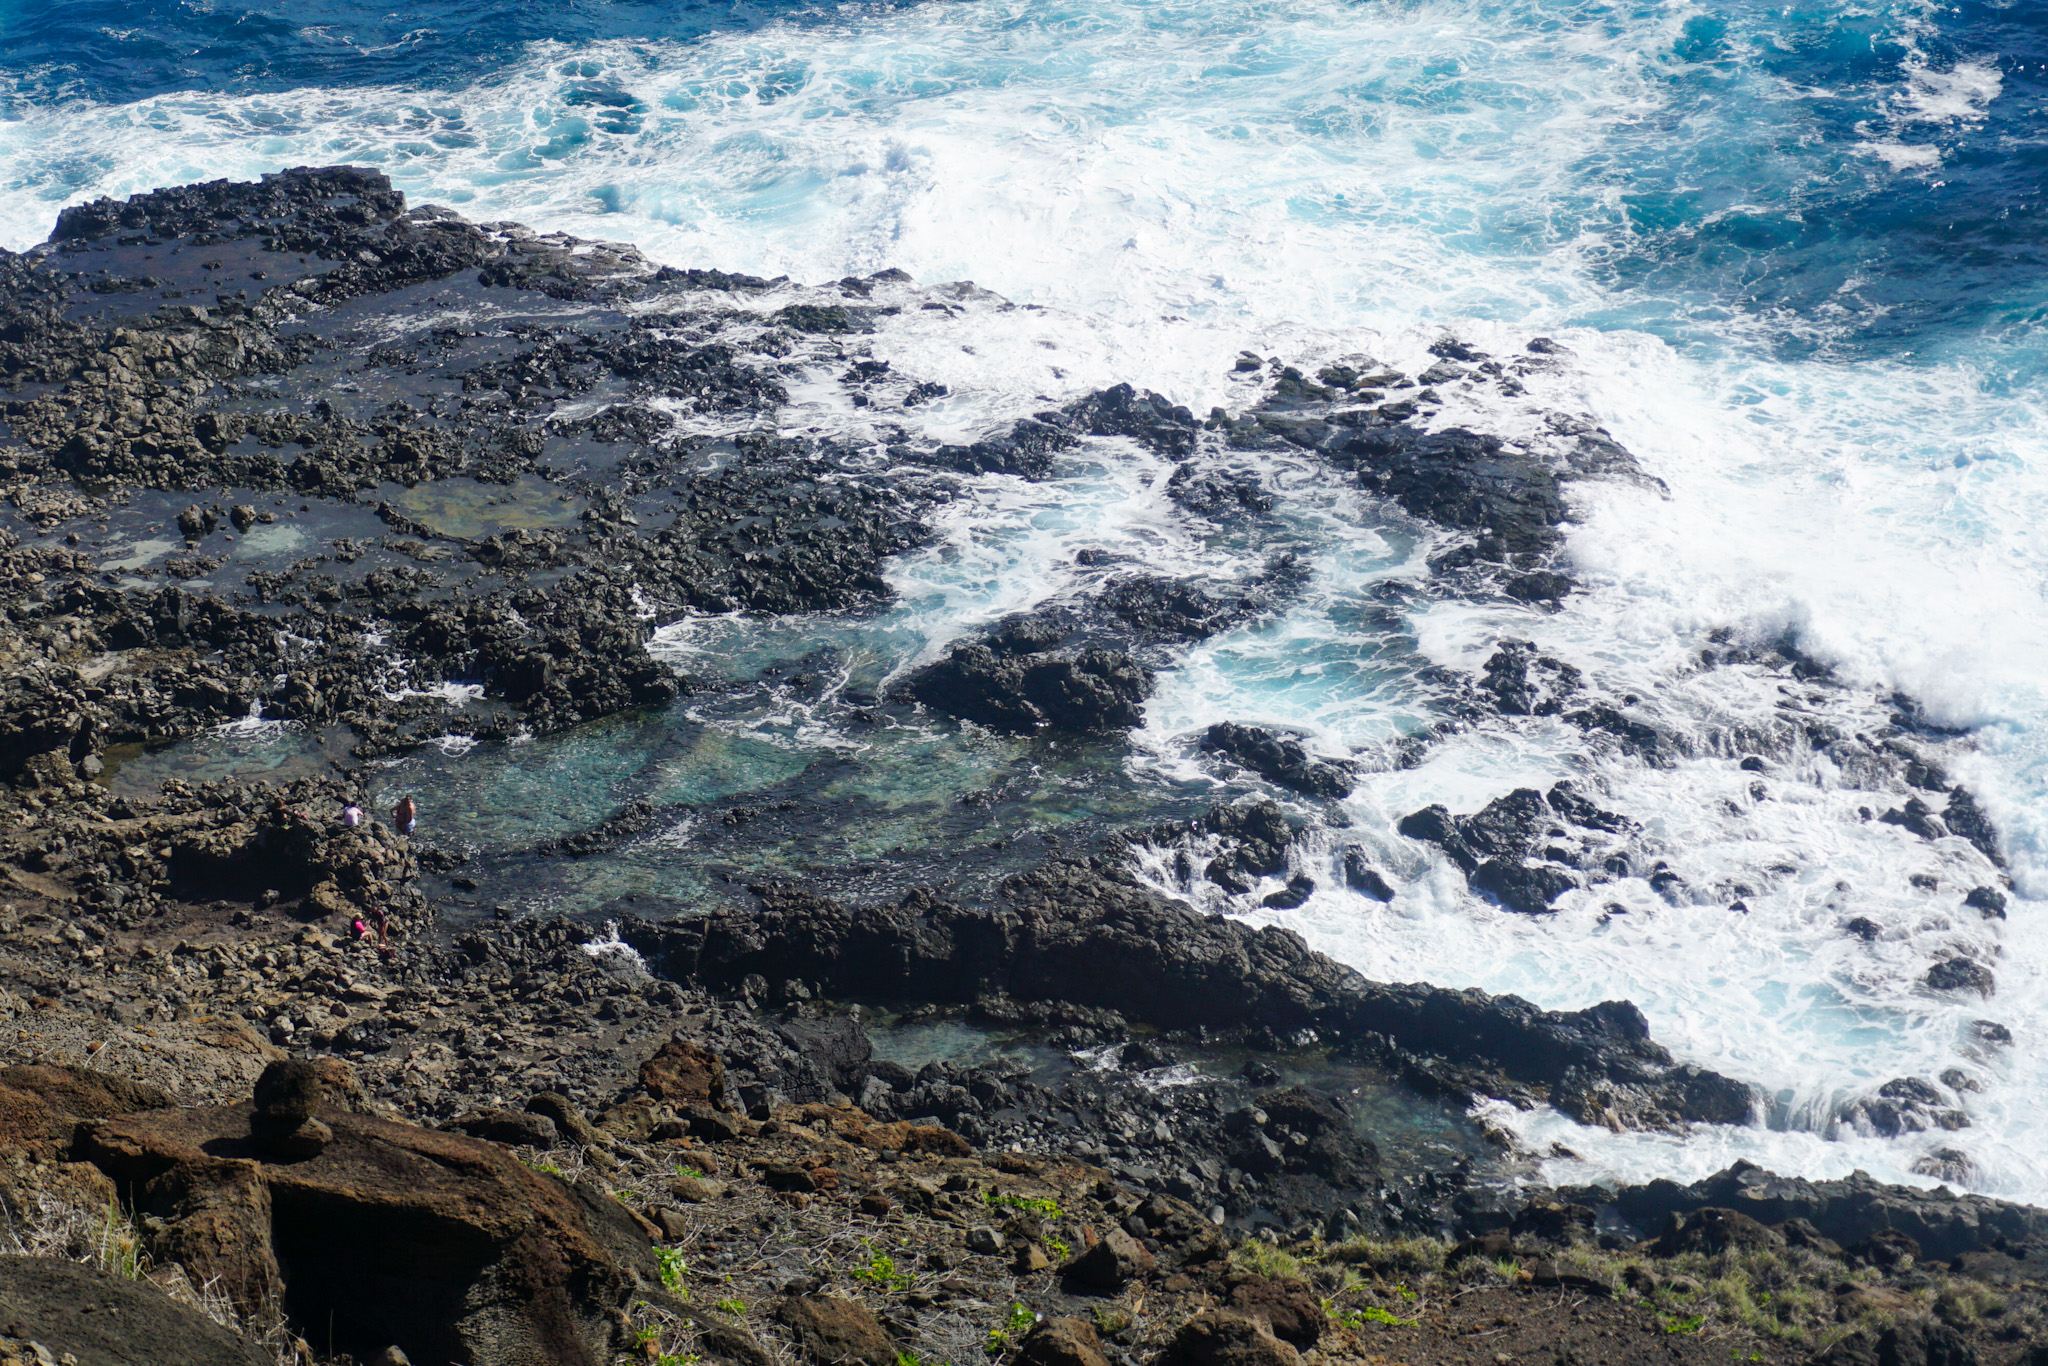
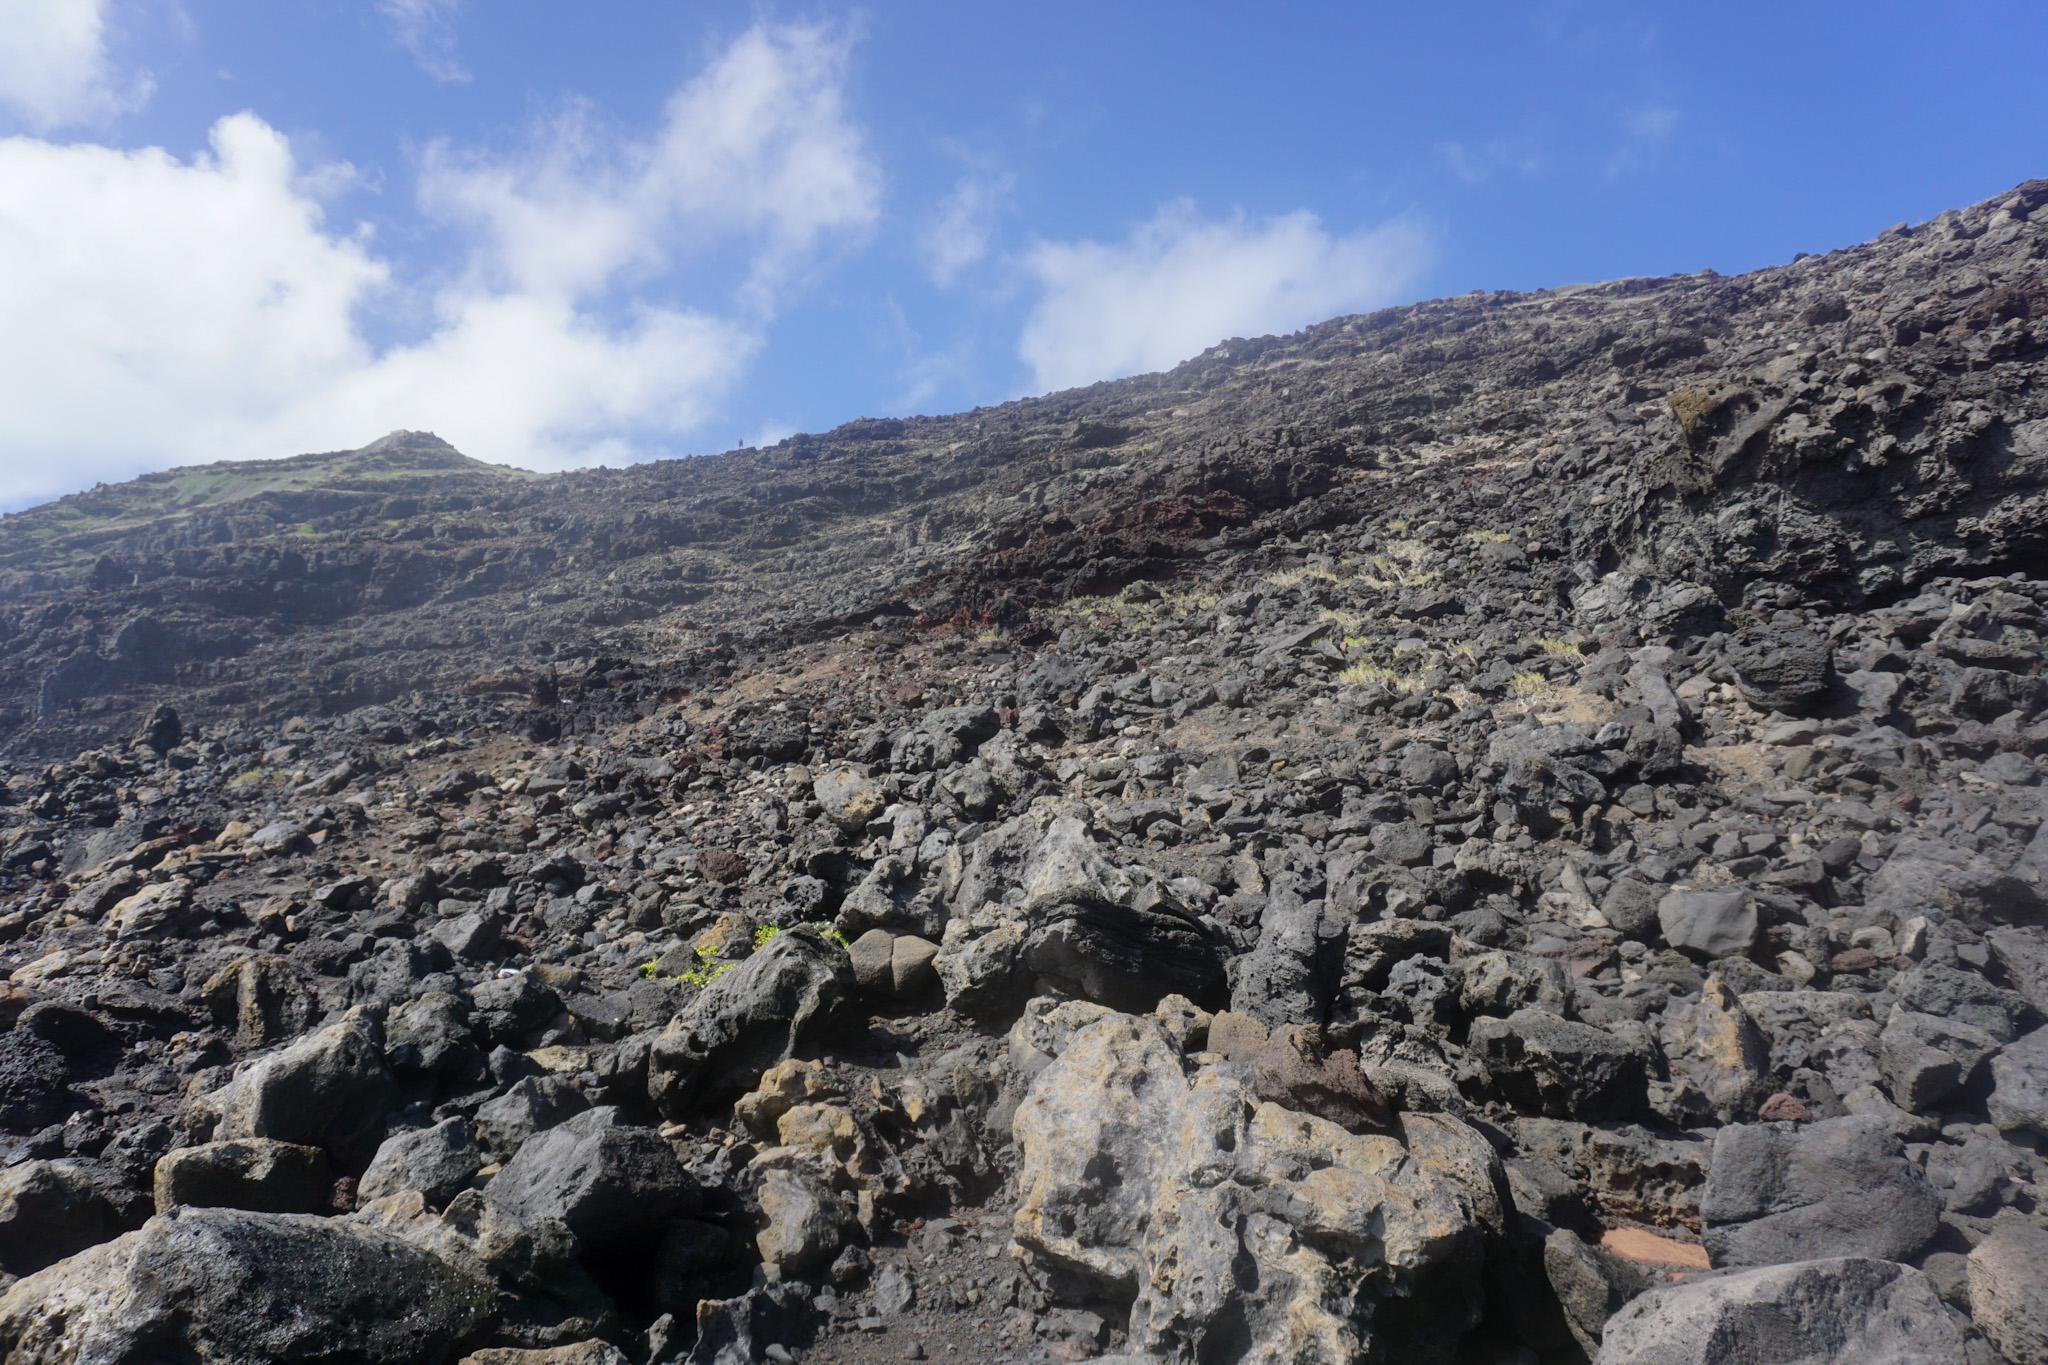
Second Half (Rock scramble to tide pools): Intermediate


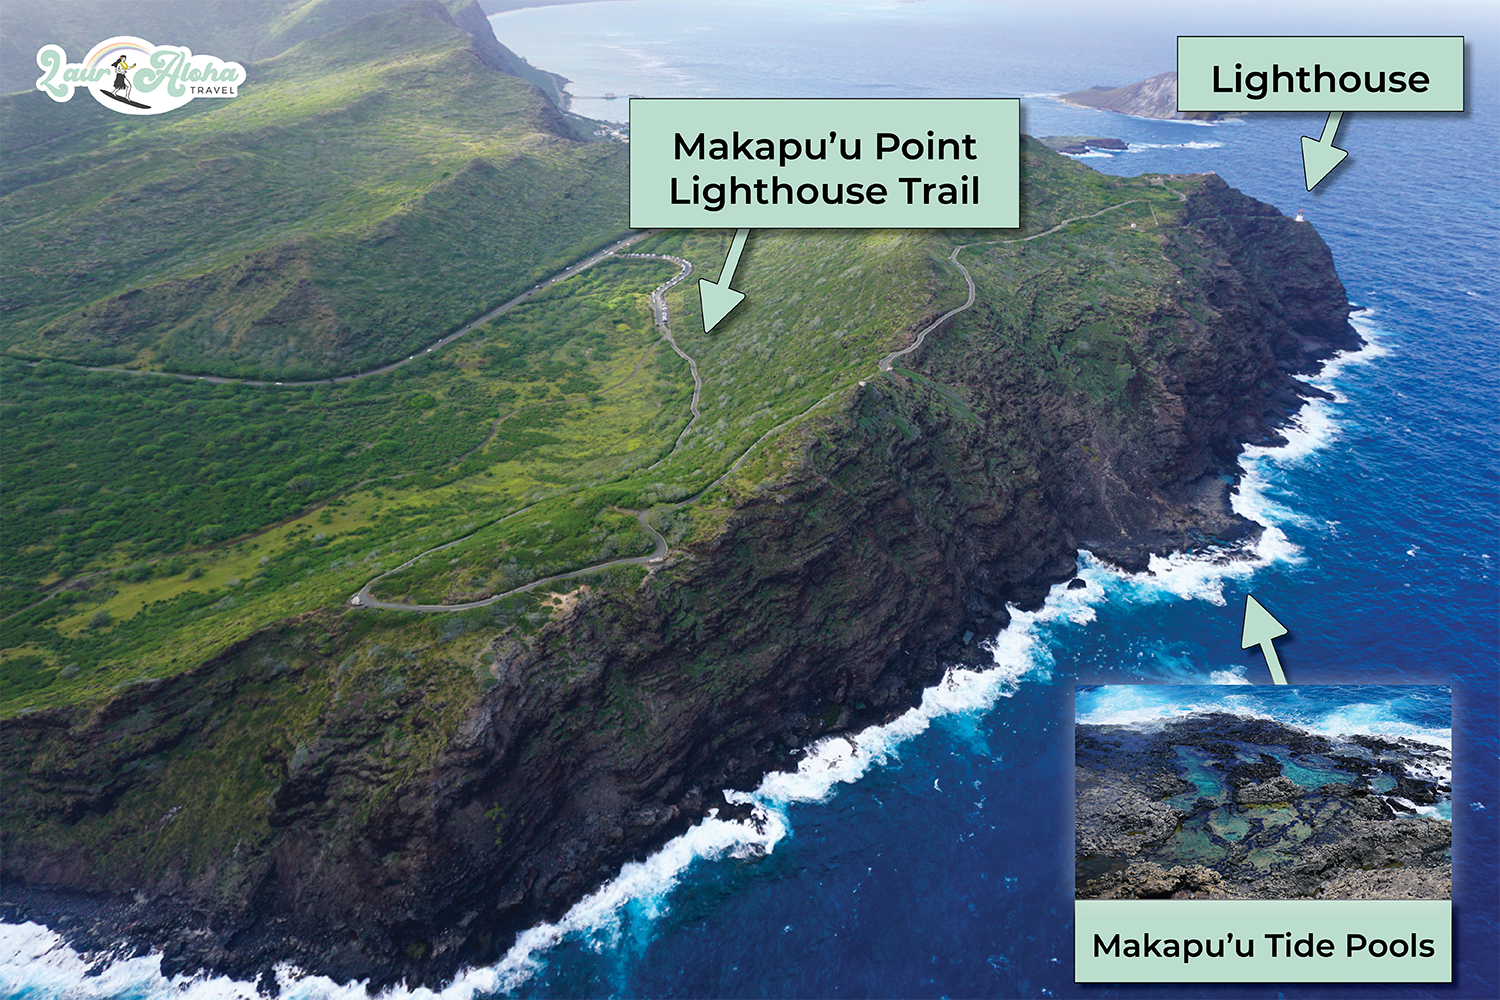
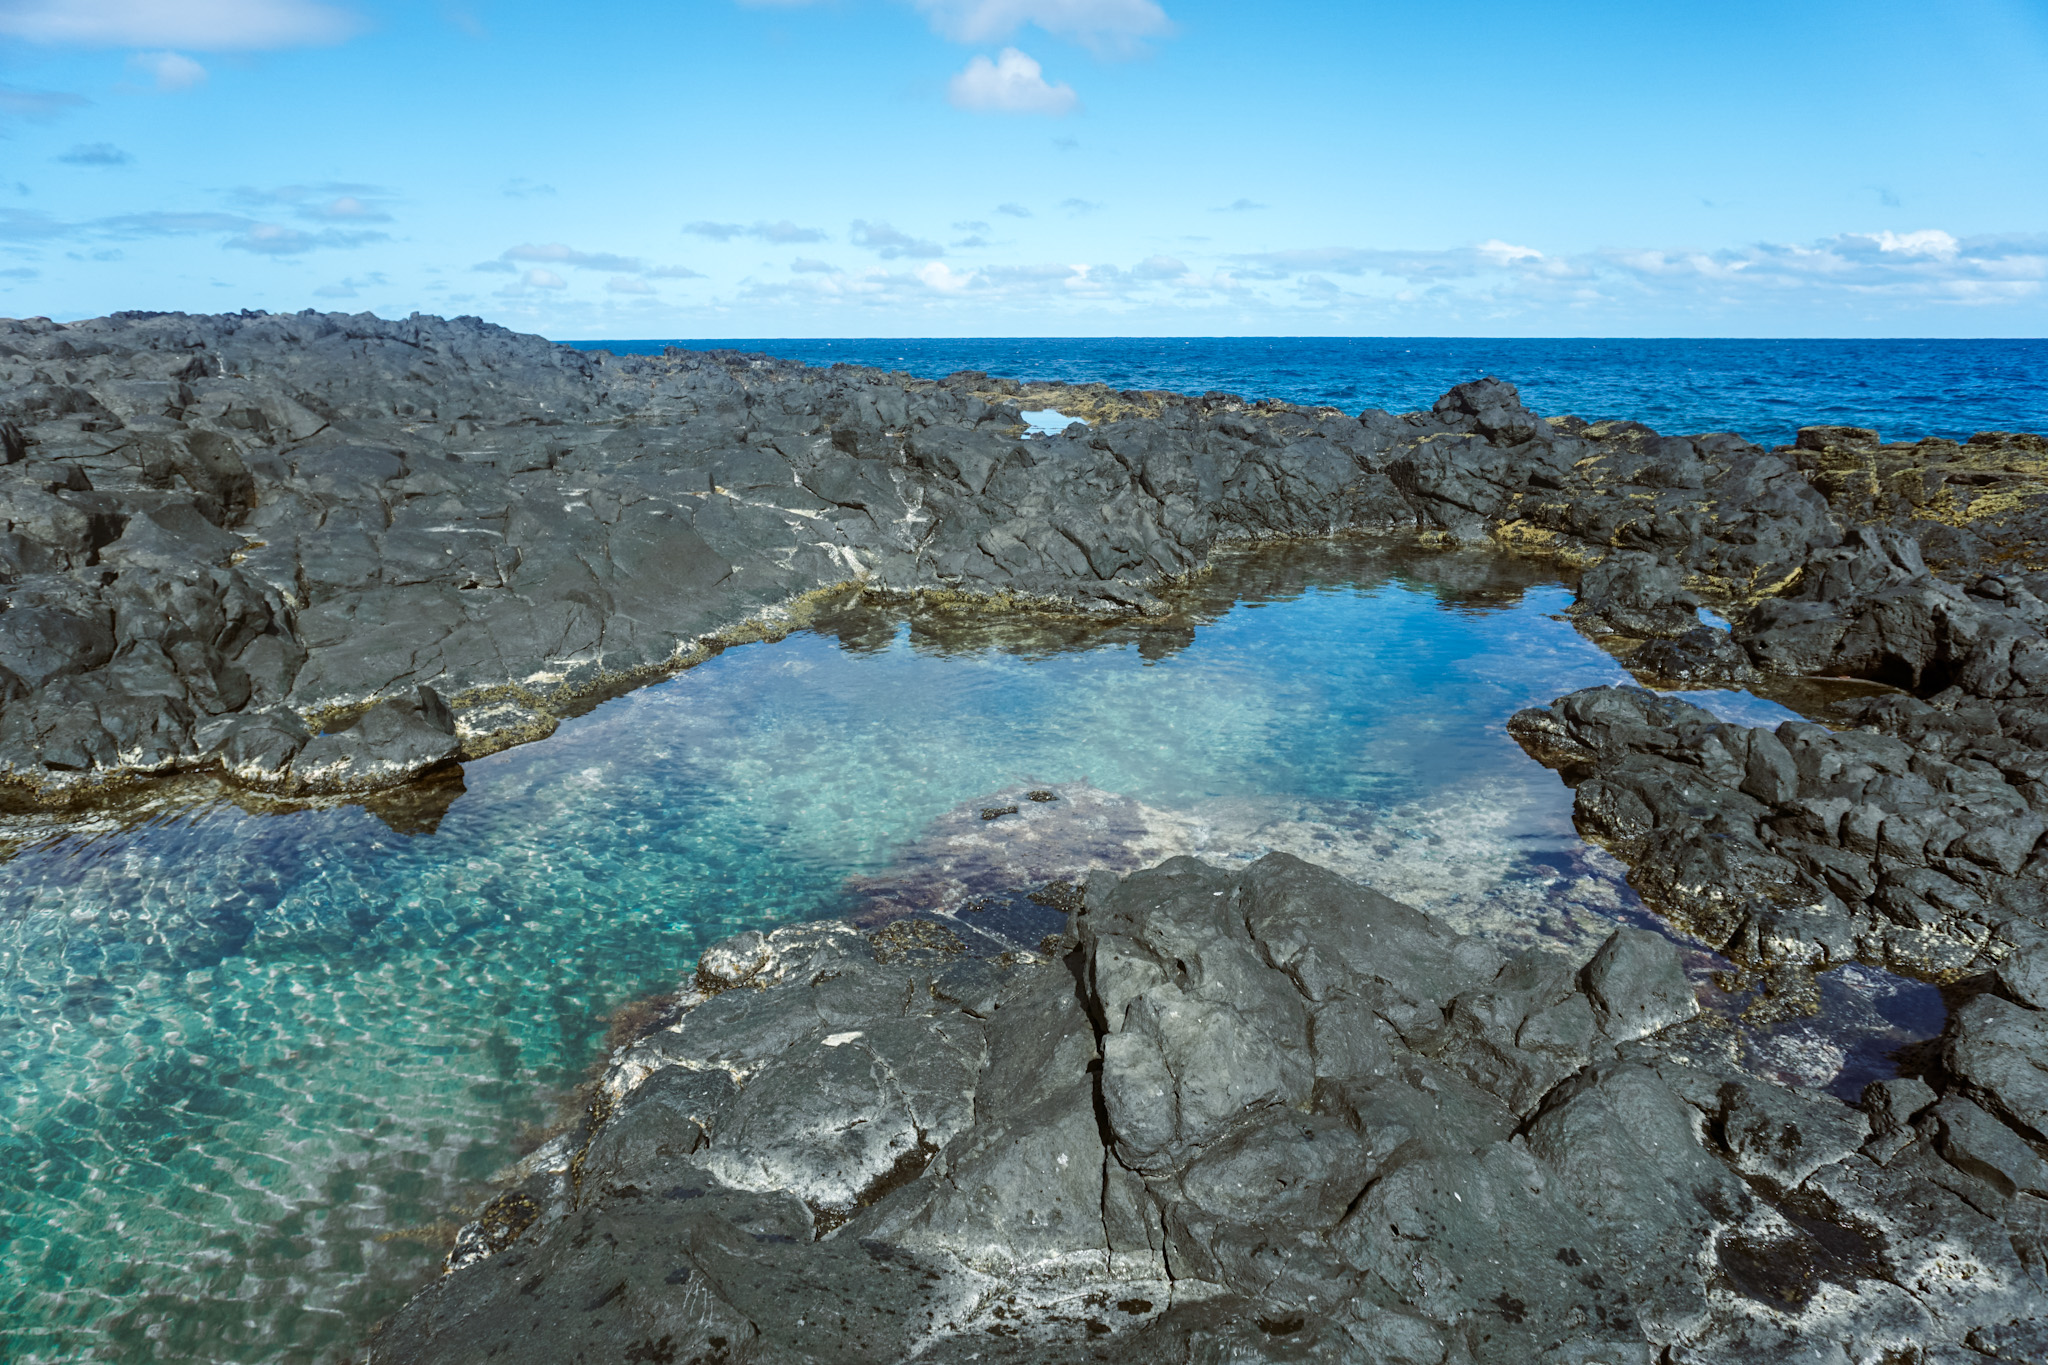
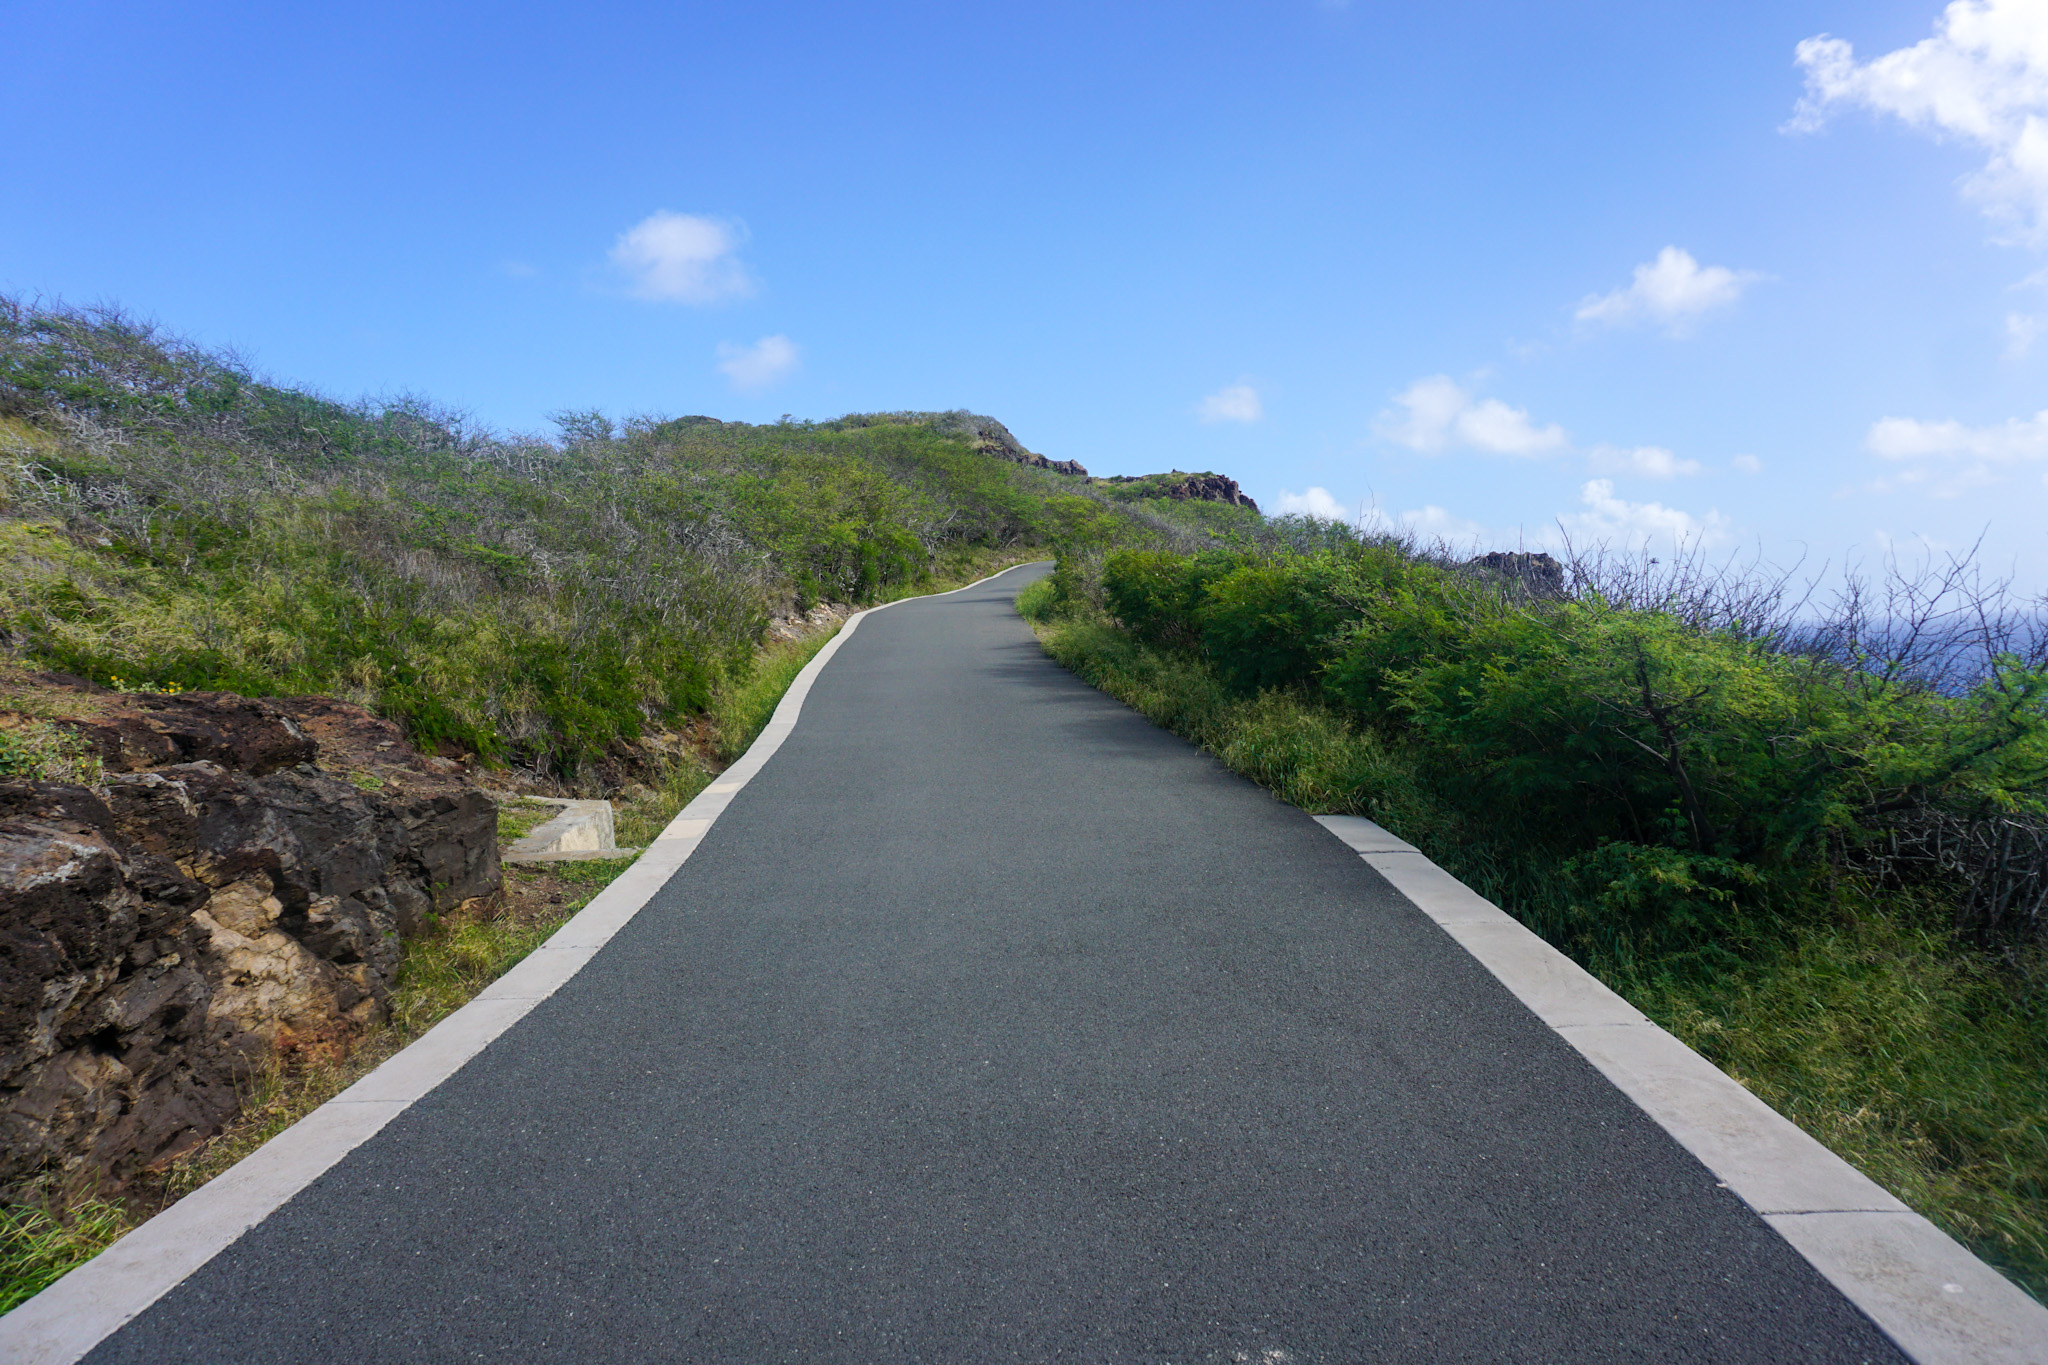
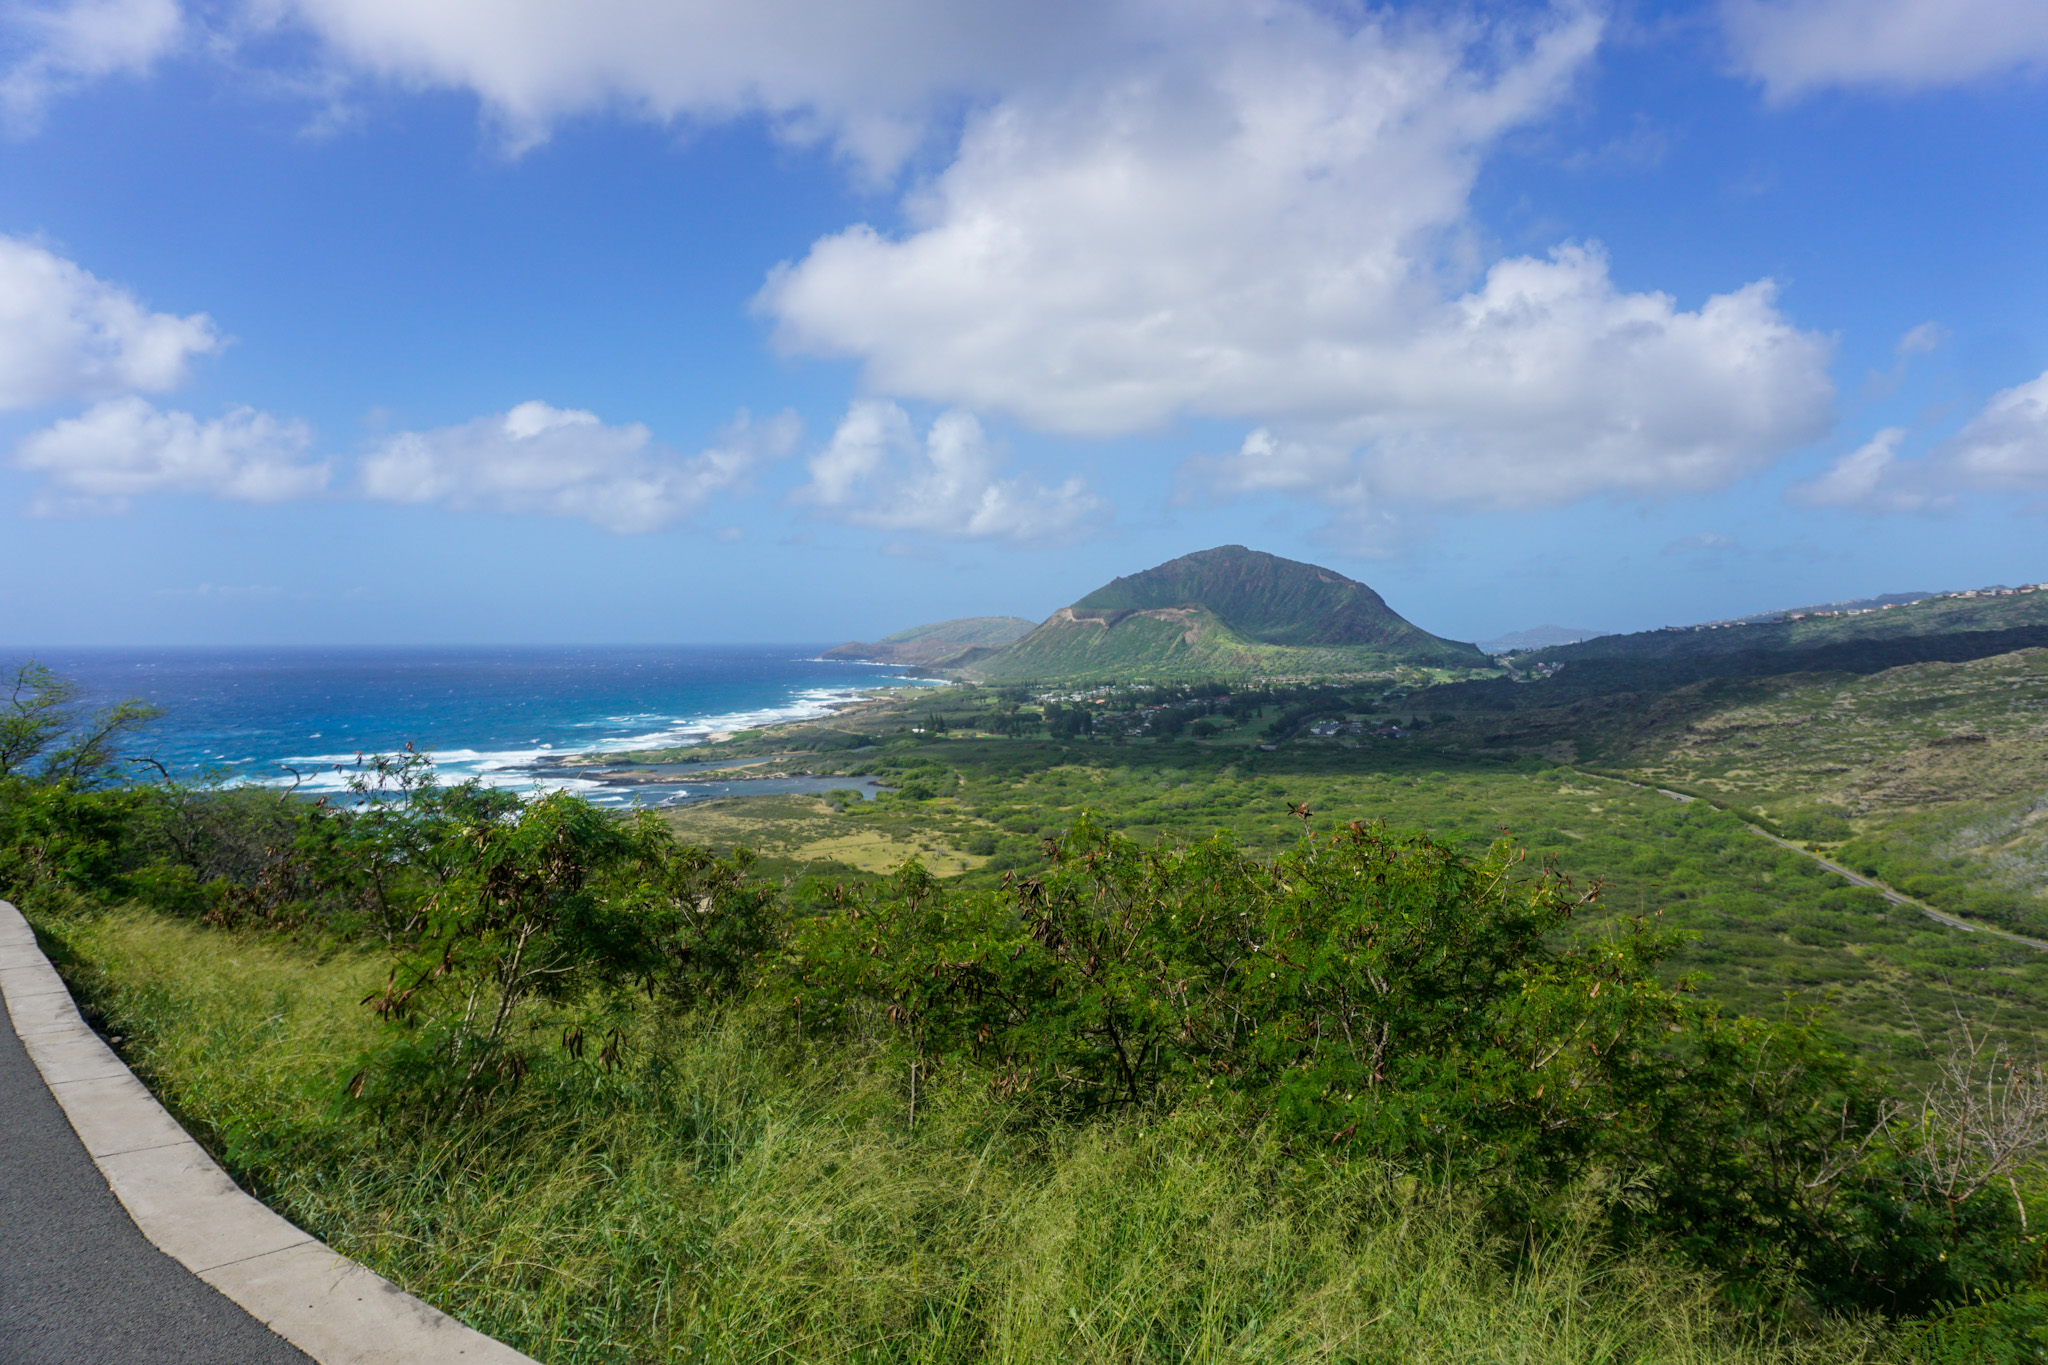
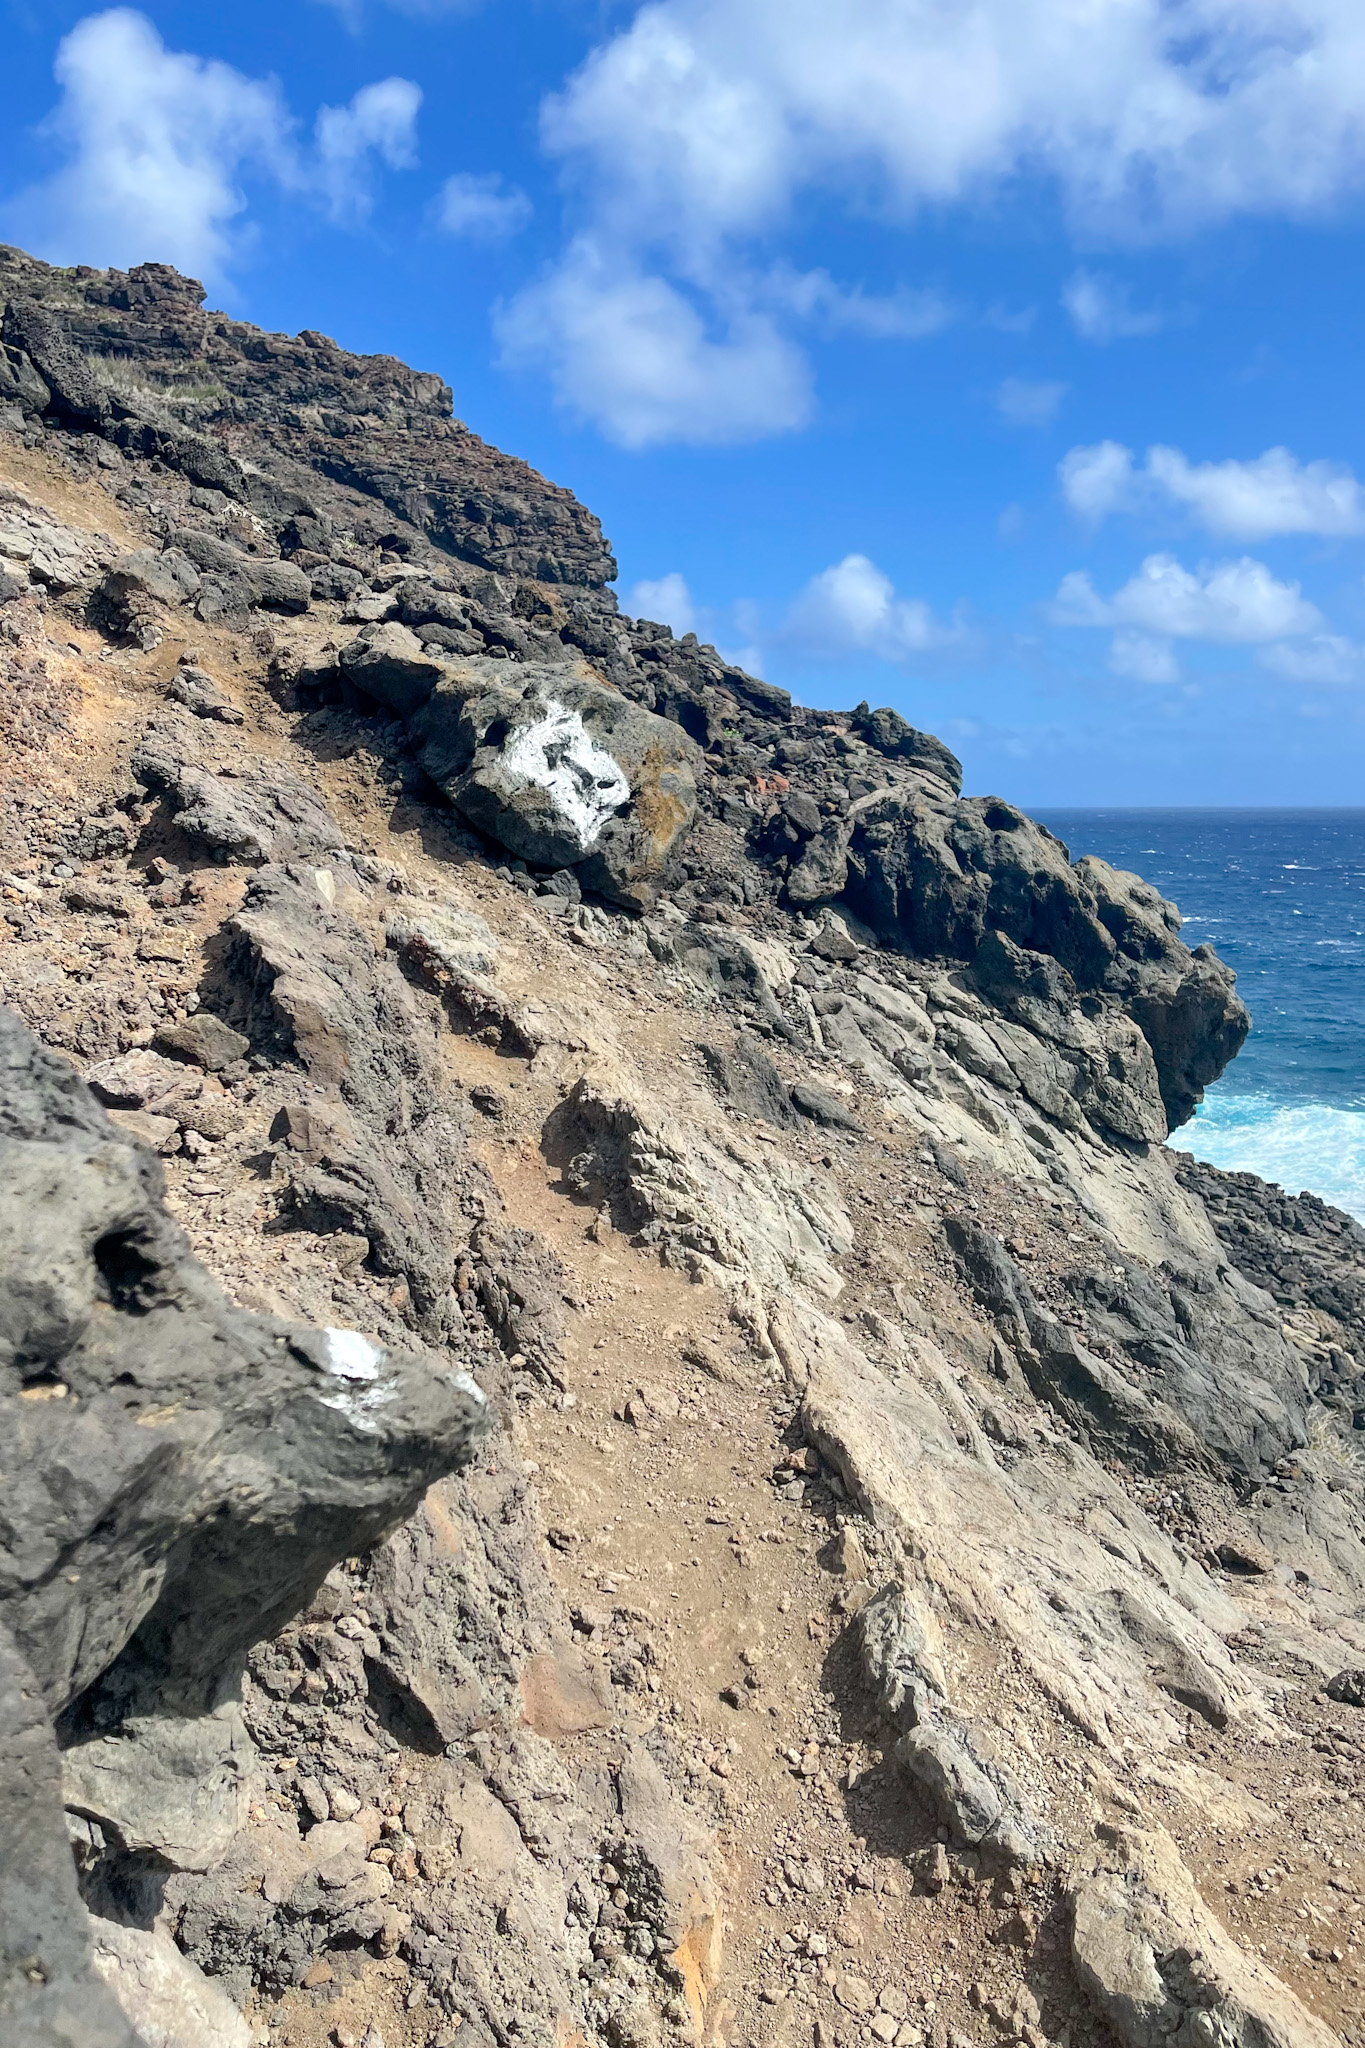
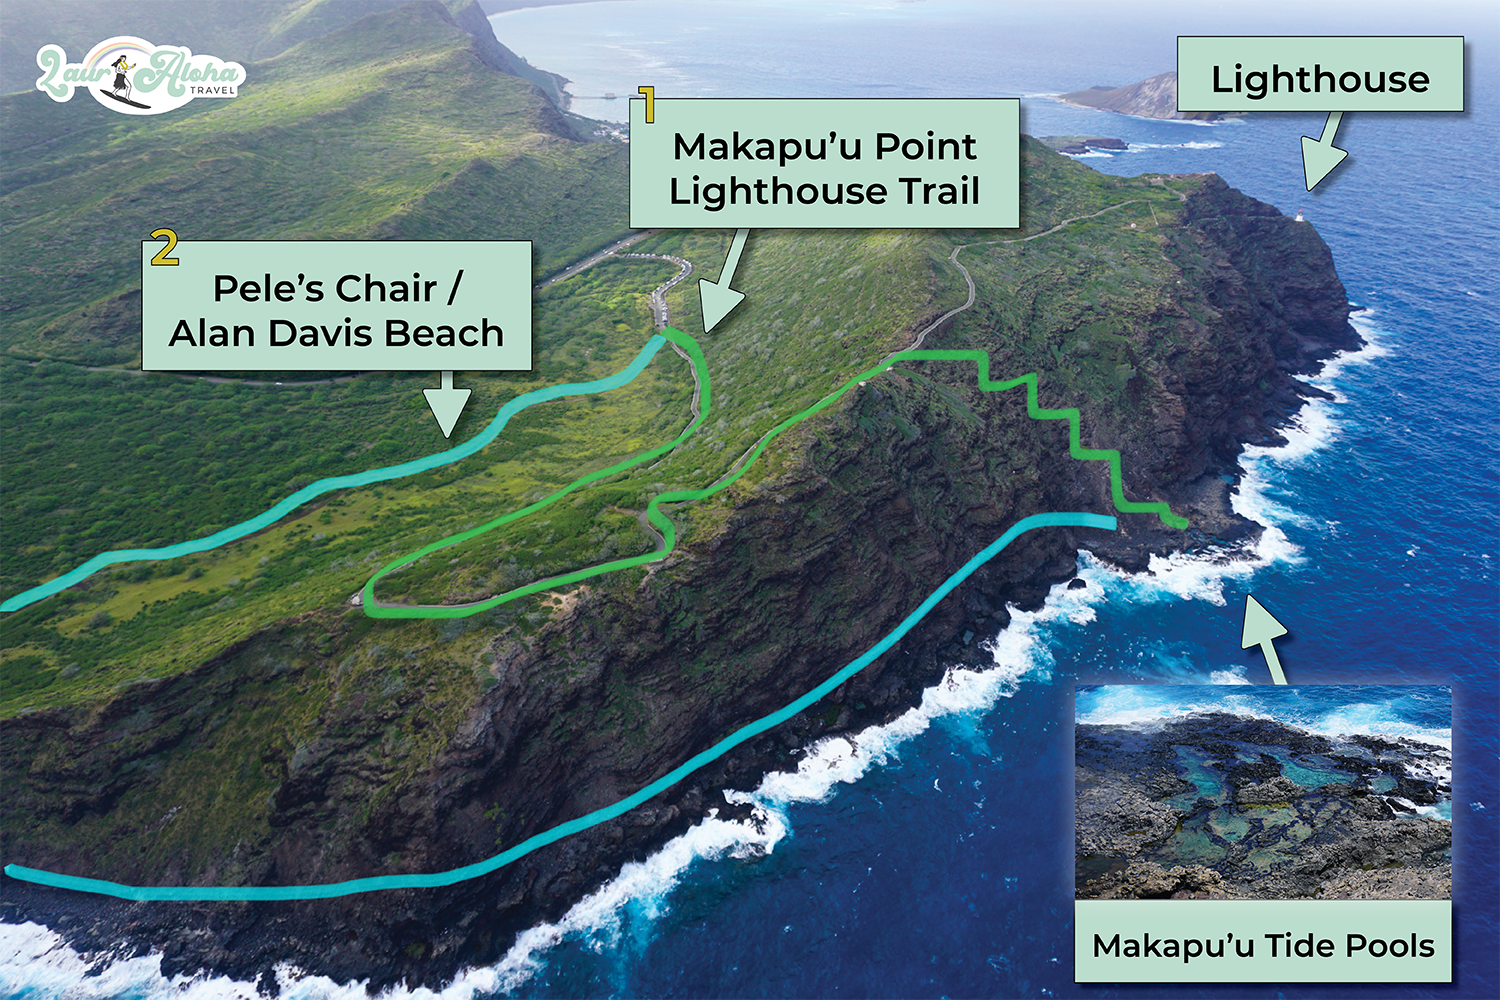
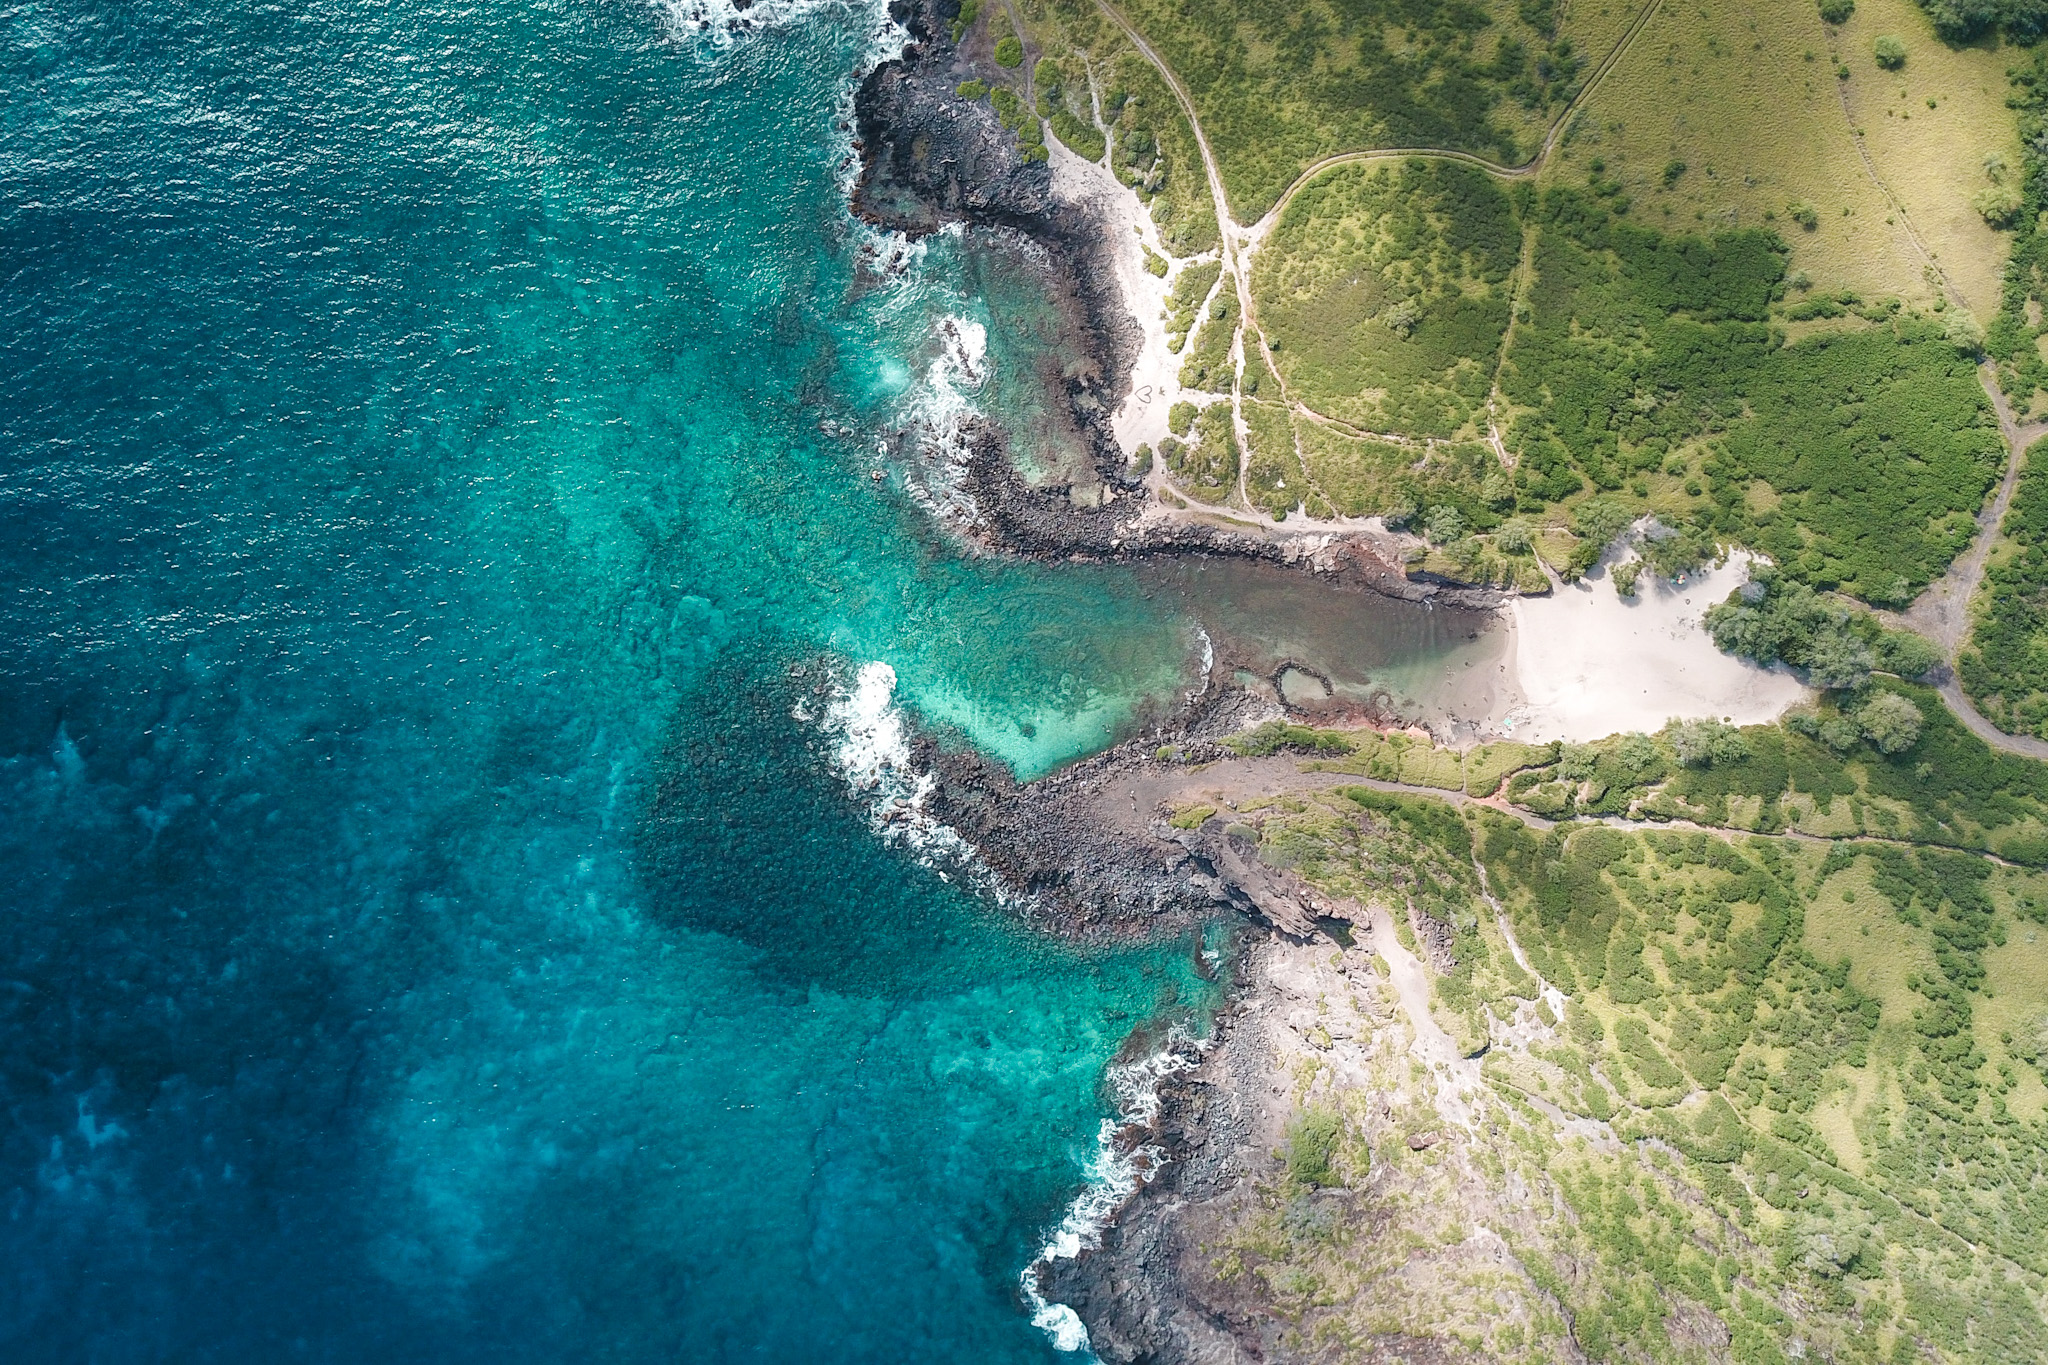
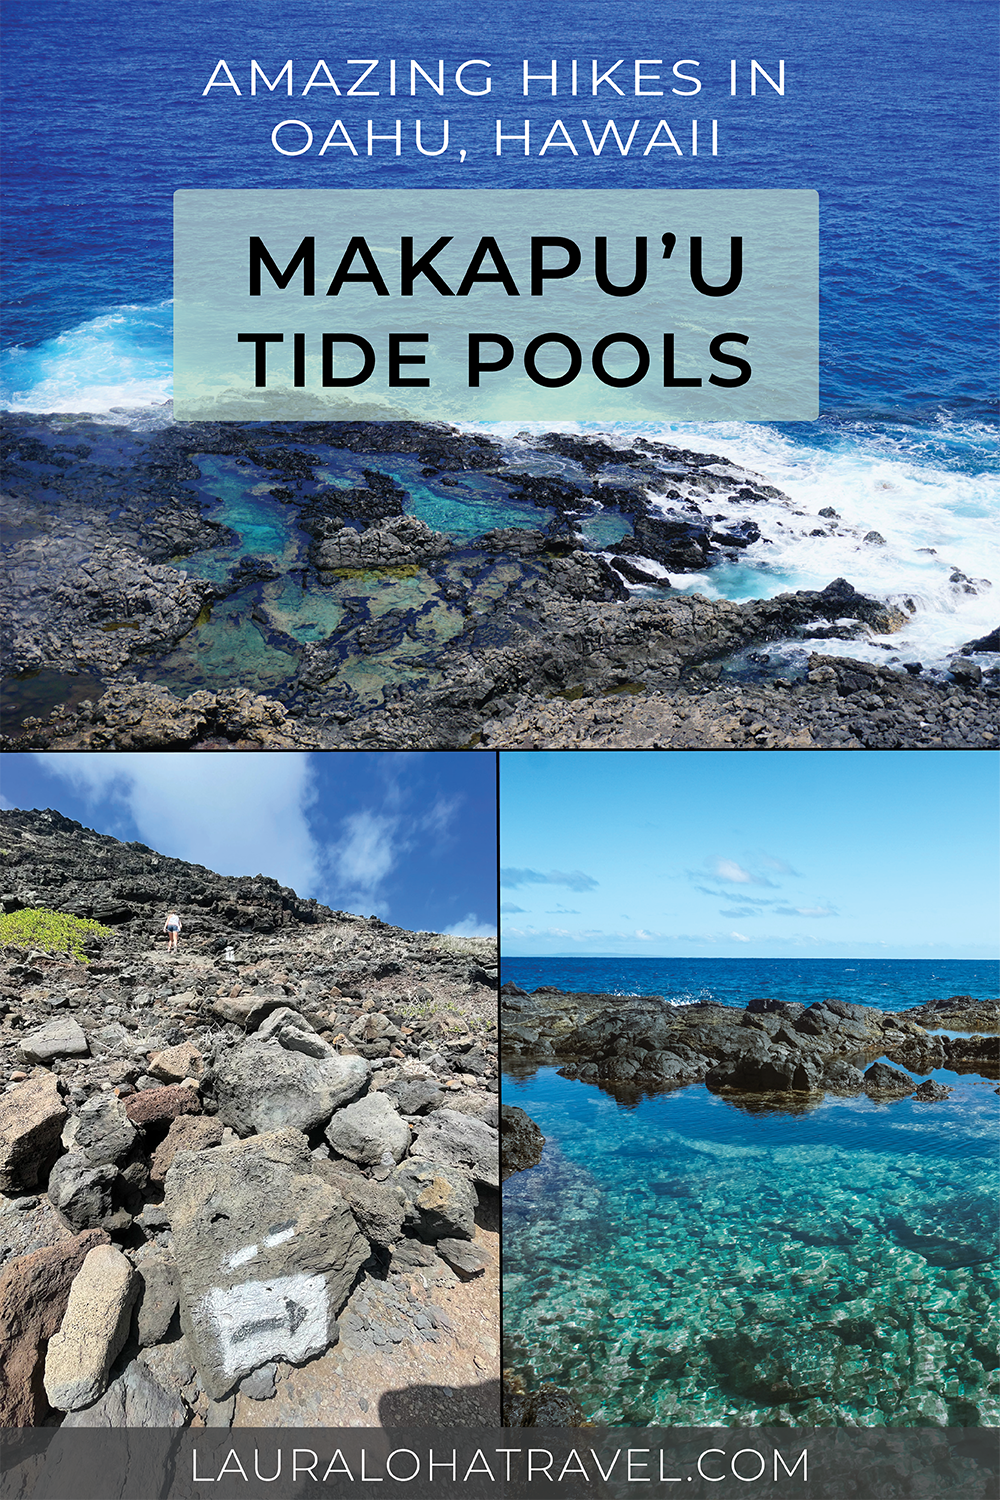
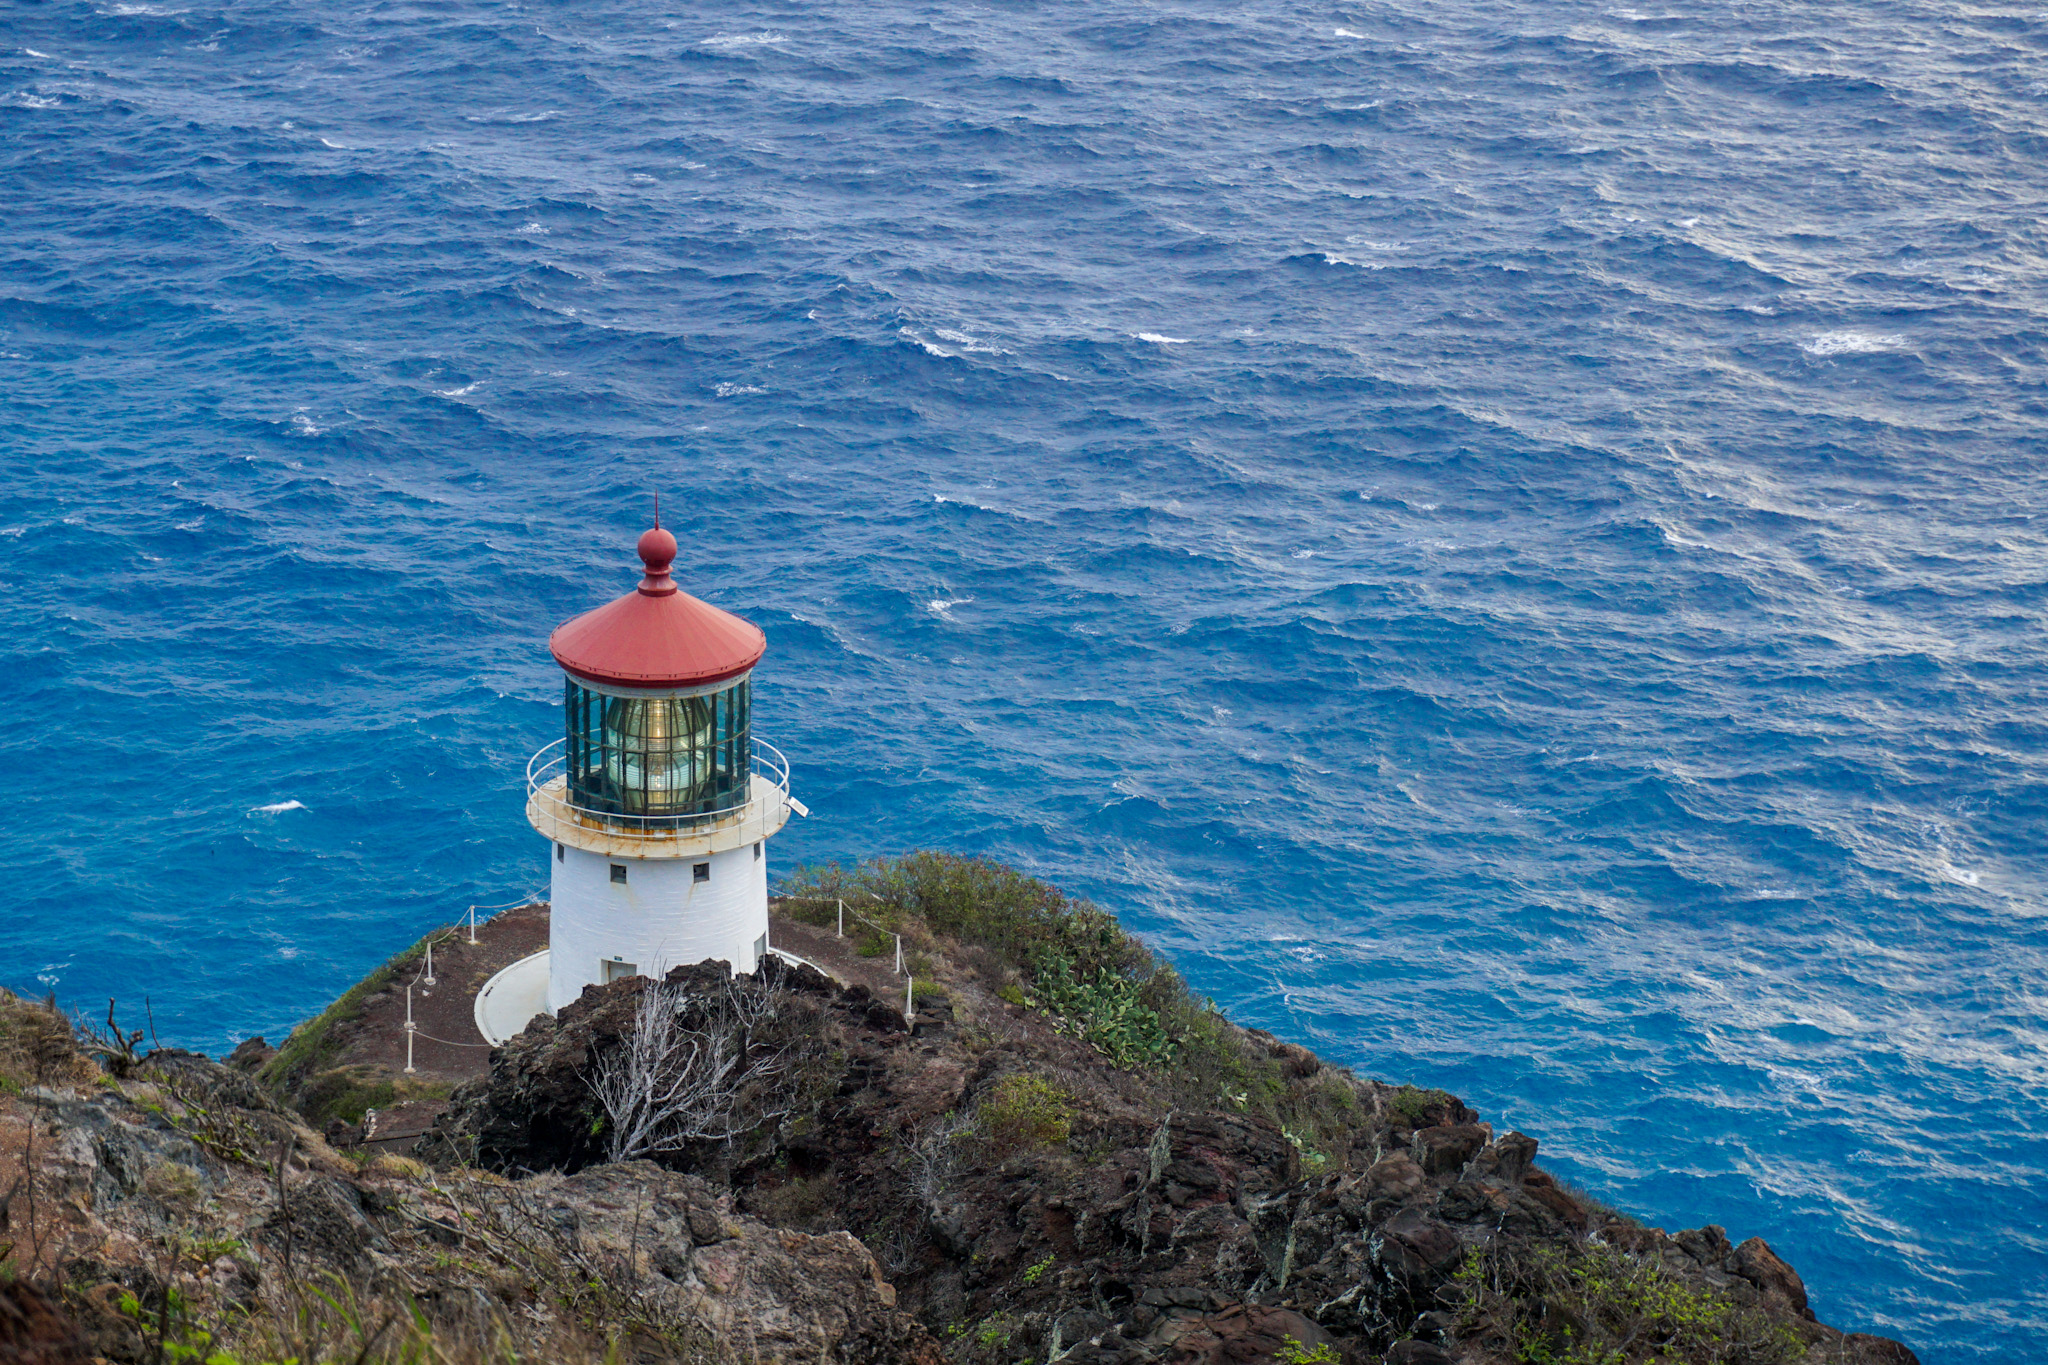
The first half of the hike is easy to moderate. You will be walking on a paved incline that is part of the Makapu’u Point Lighthouse Trail (aka the Kaiwi Shoreline Trail). There are a few places along the way to rest and take in the scenic views. The third rest area is where you will need to climb down a mountain to get to the tidepools. 


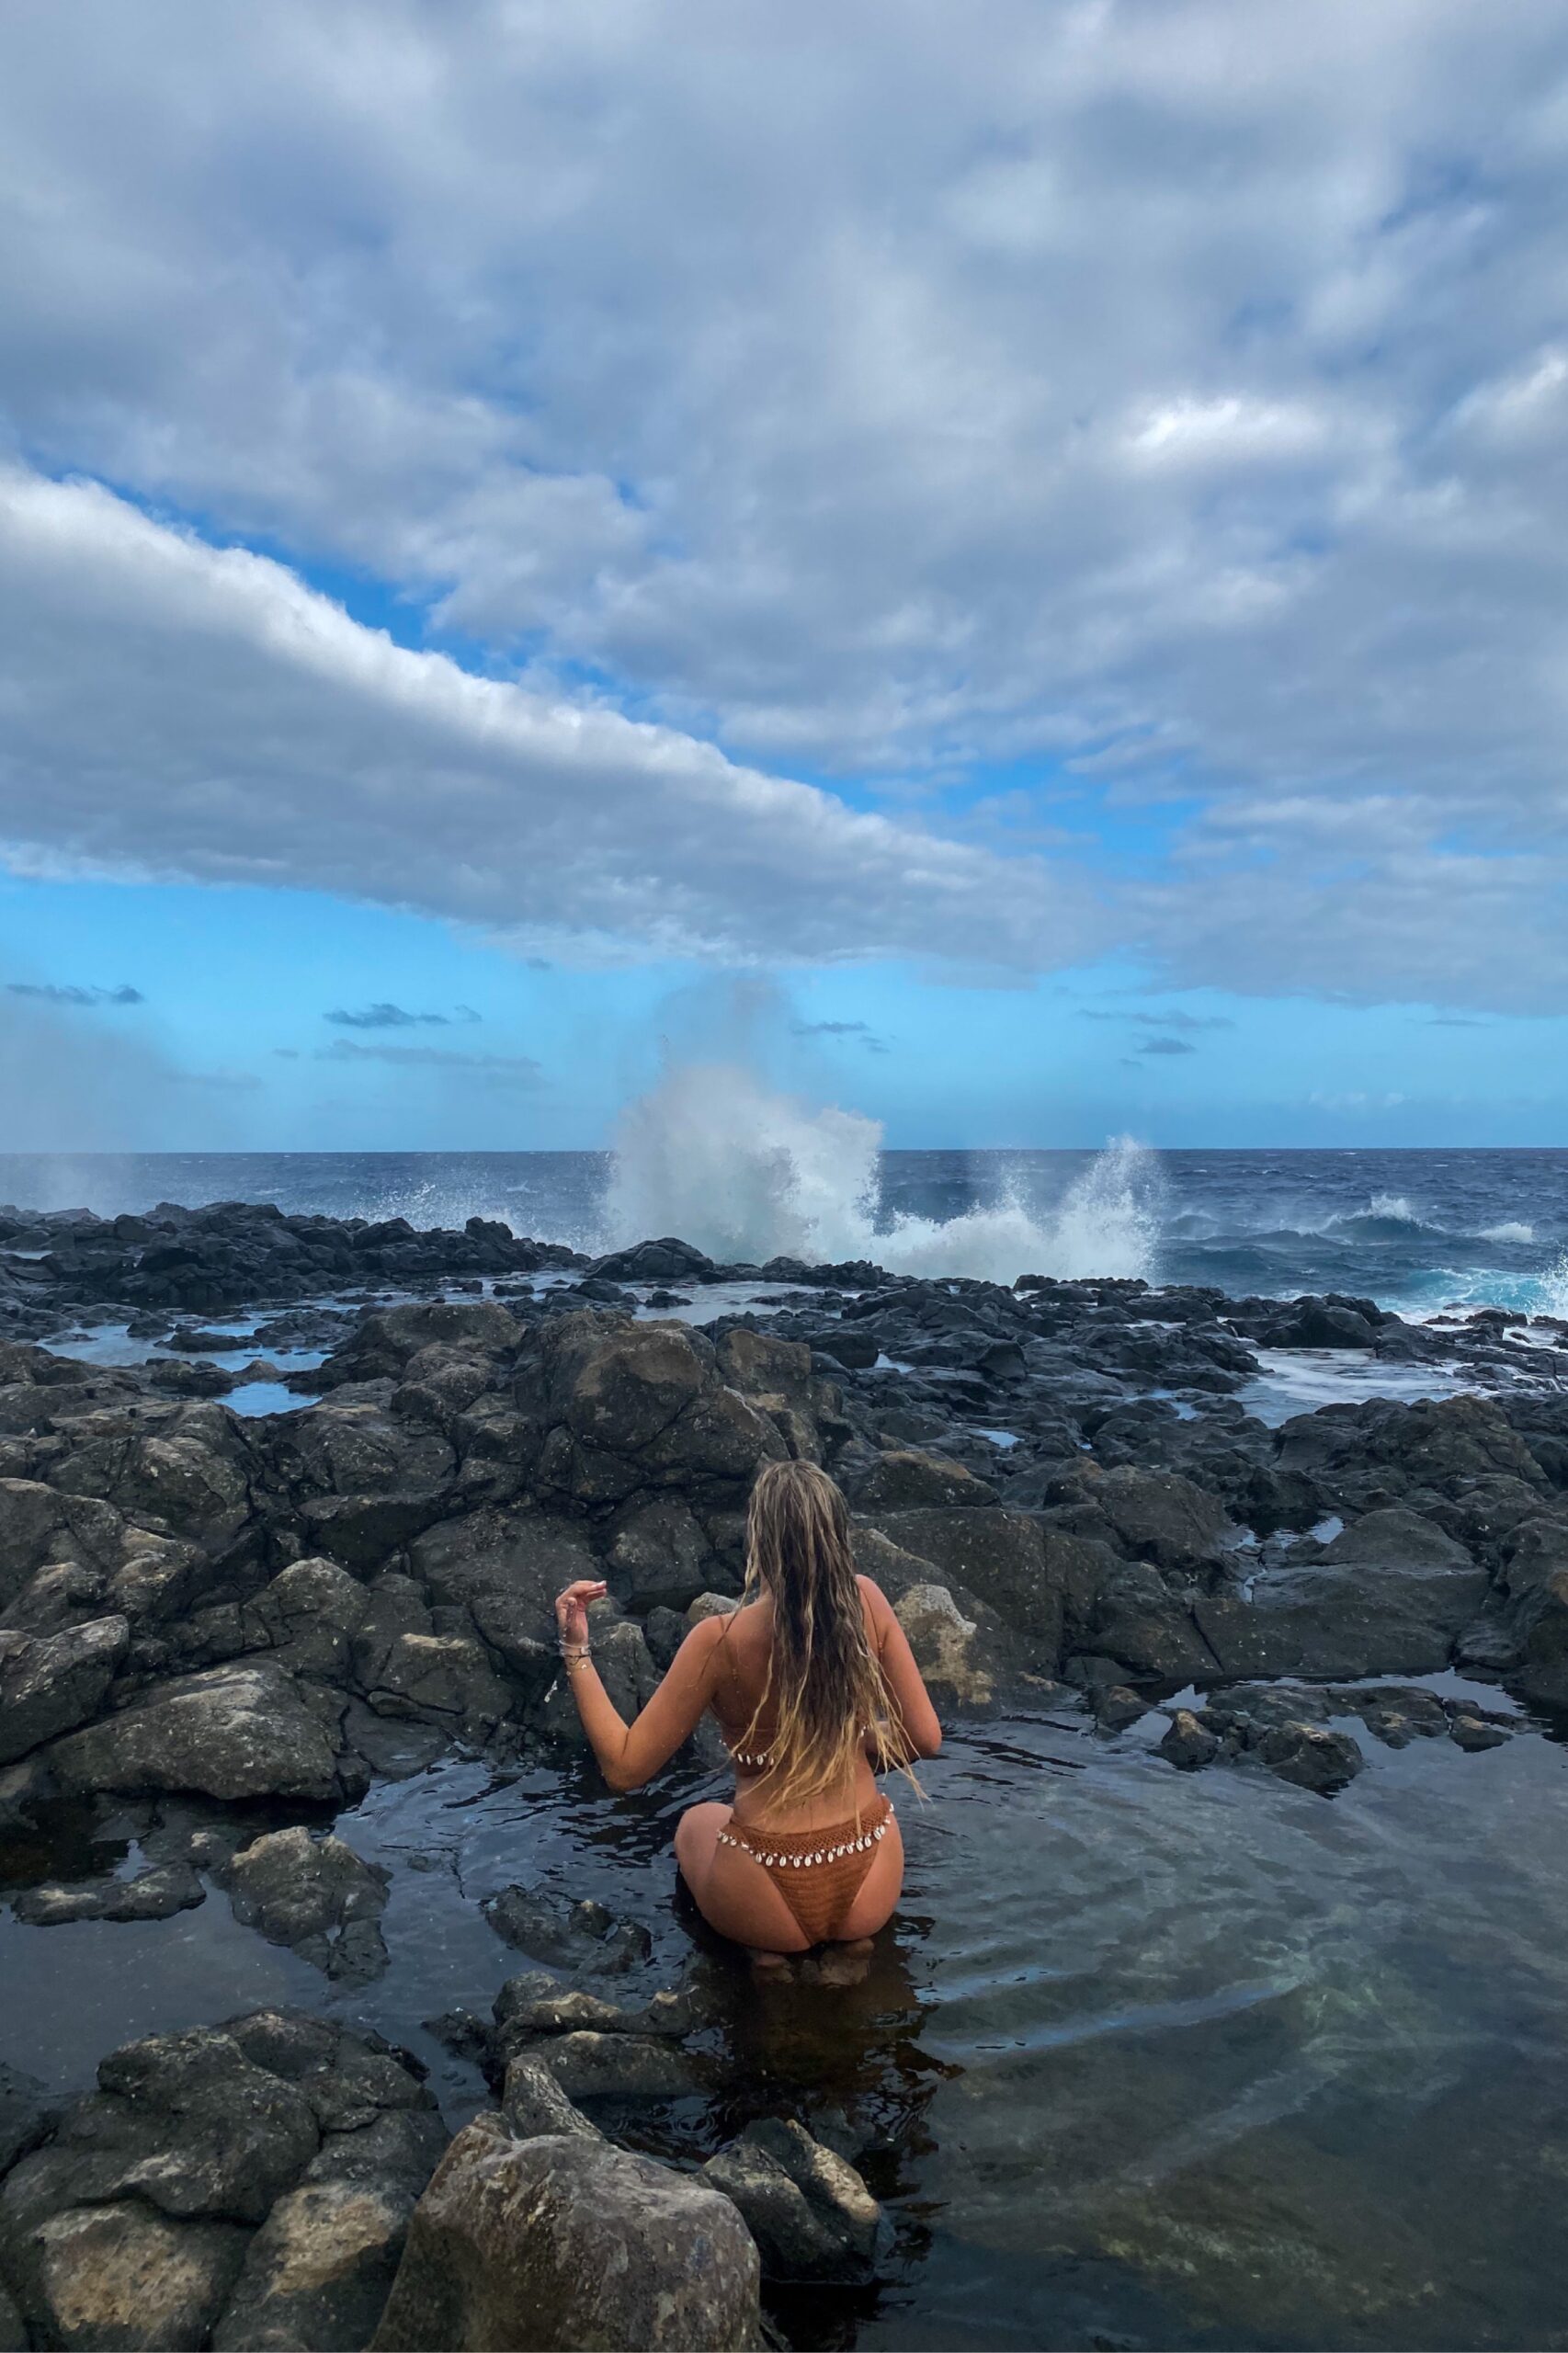
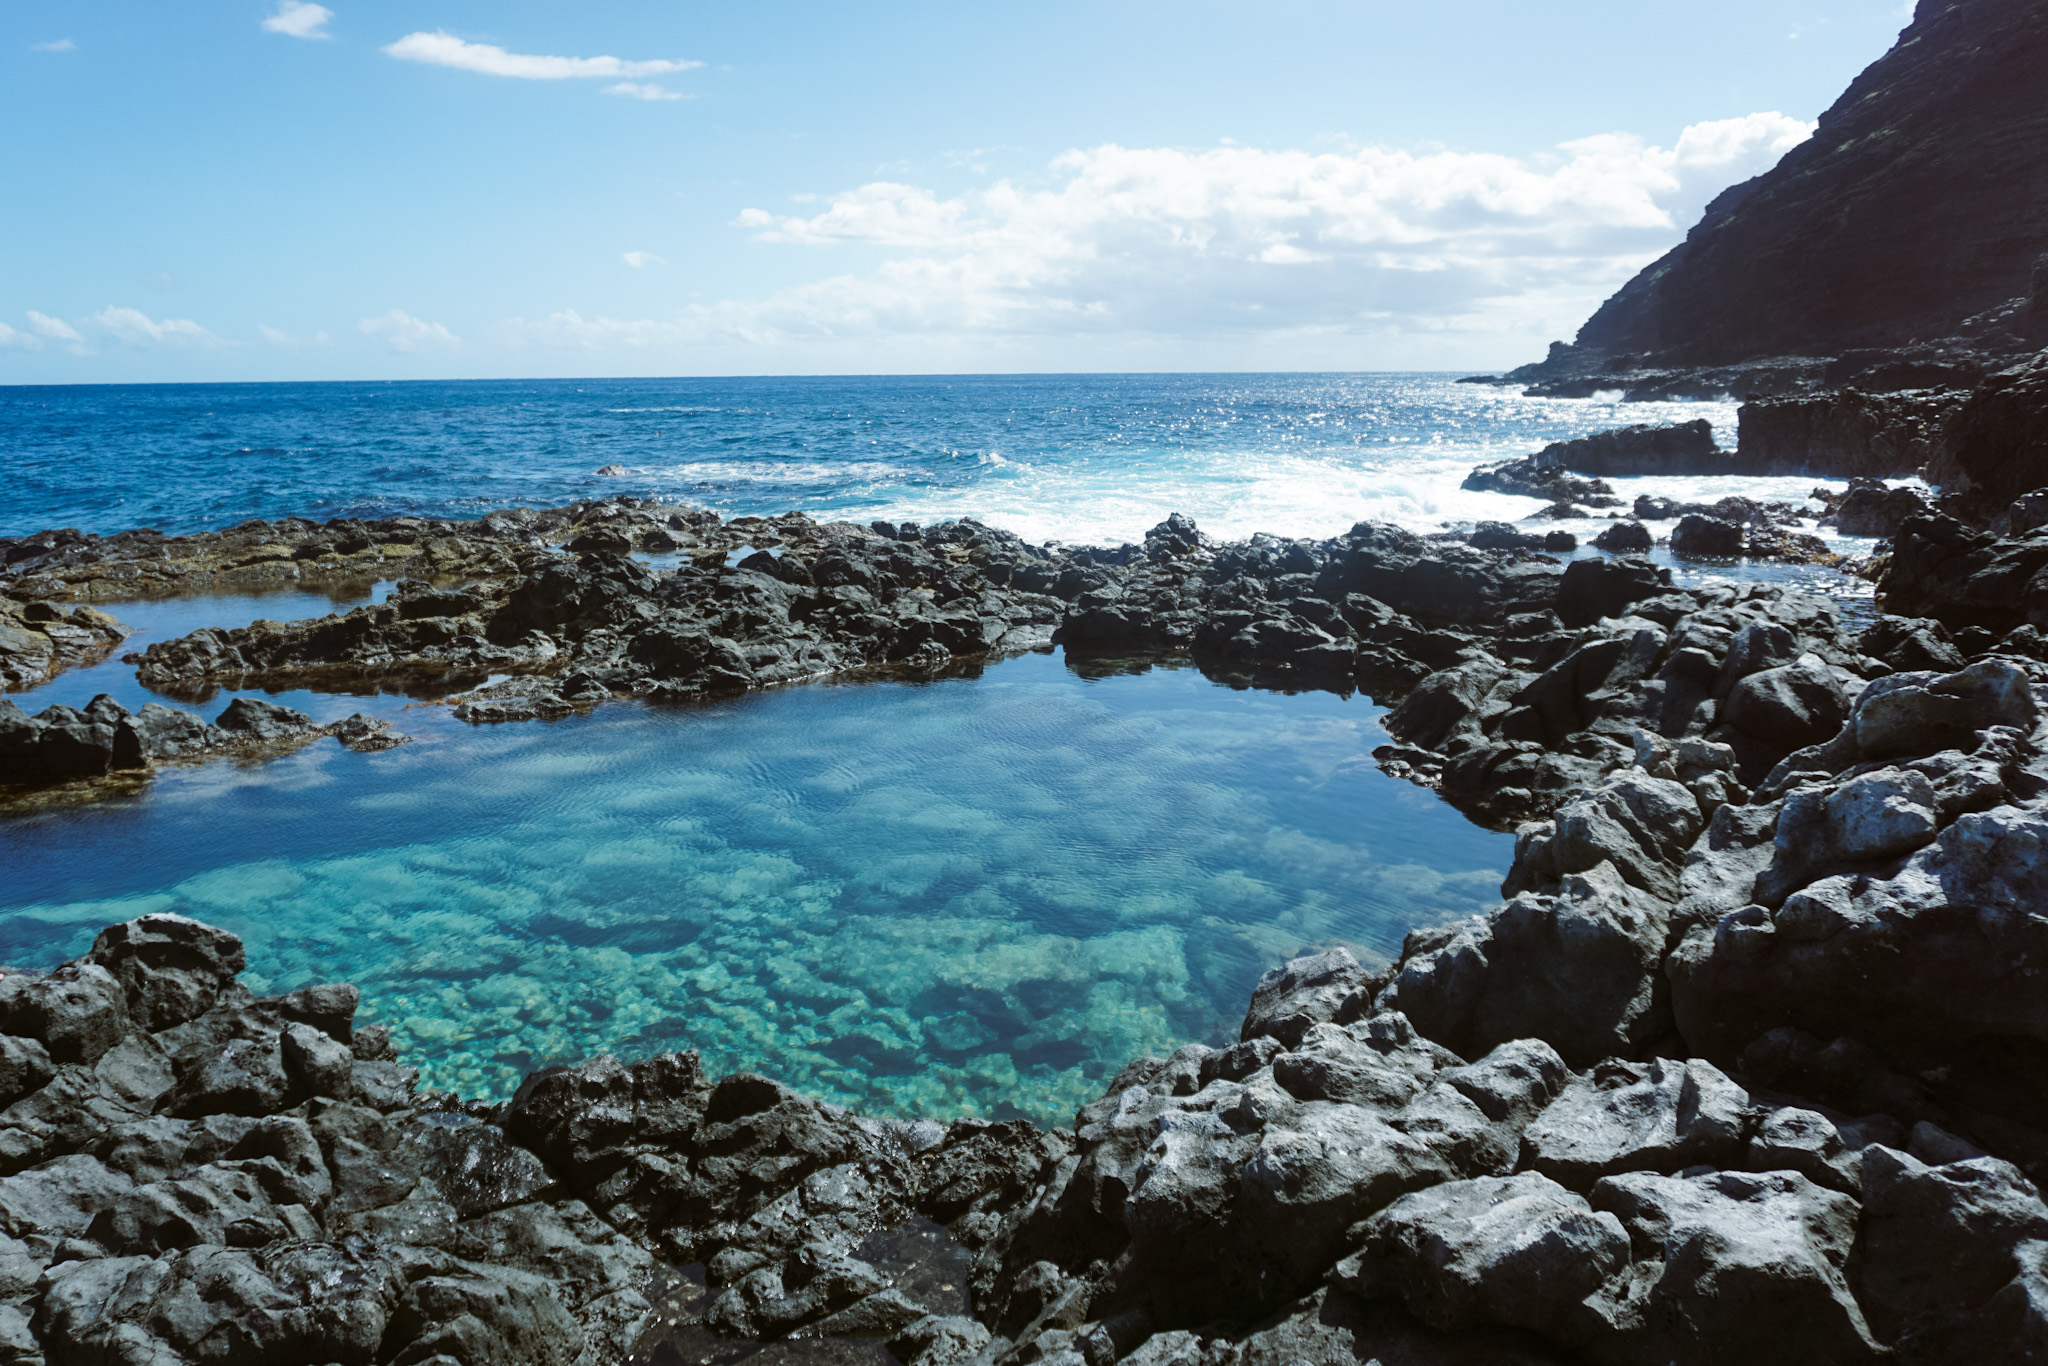
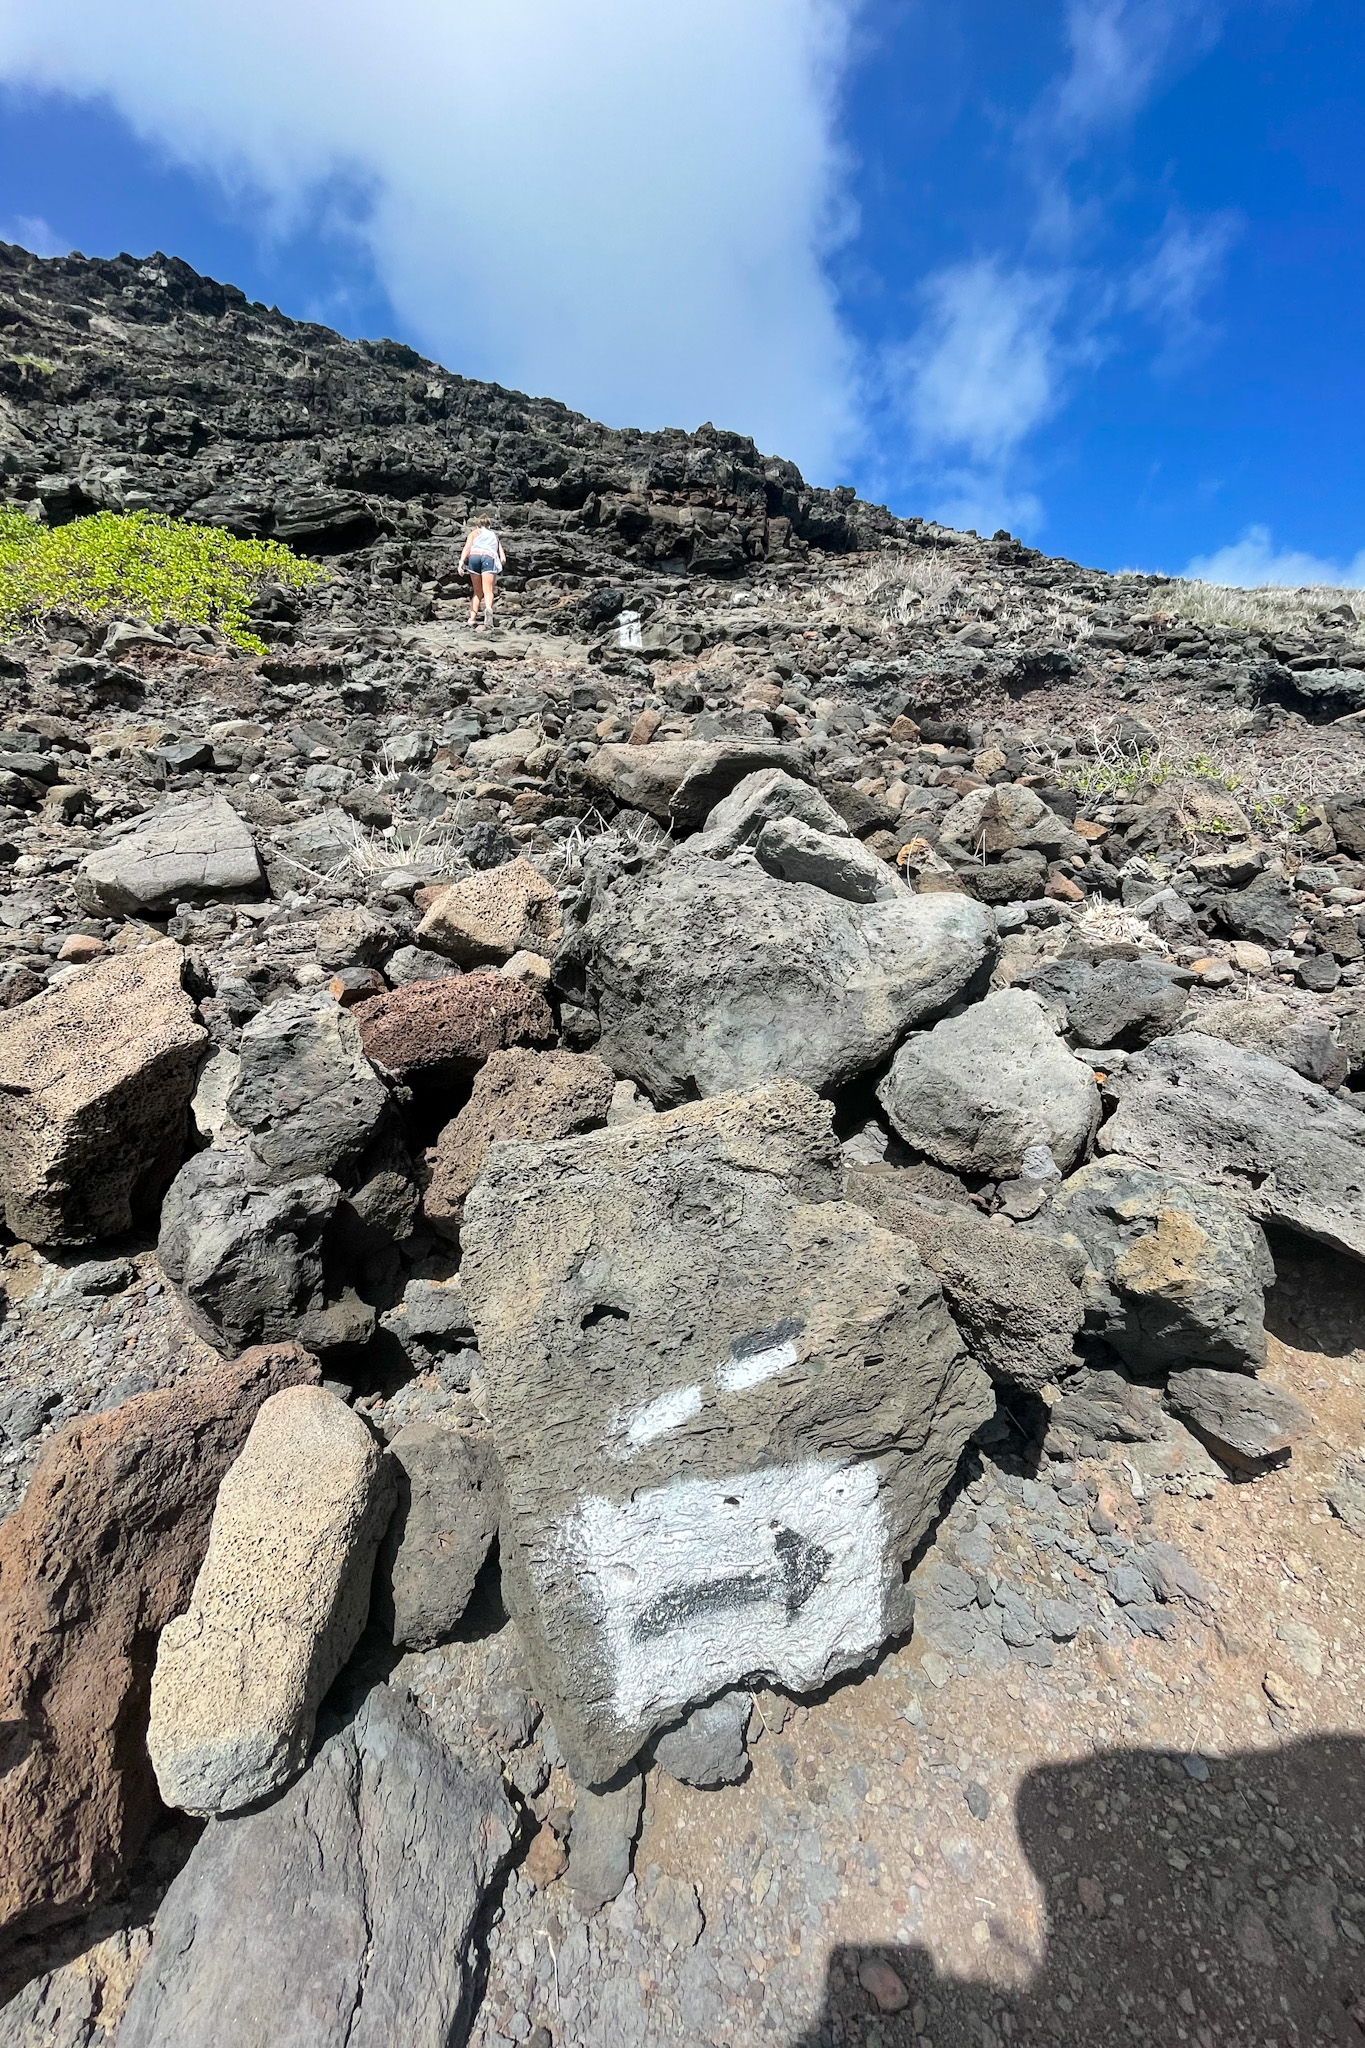
This part of the hike is much more challenging since you will be scrambling down a rocky mountainside with many loose rocks. Climbing back up is more difficult than getting down since you are scaling approximately 400 feet. I would not recommend the tide pool hike for small children or those not confident in their ability to climb over loose rocks.


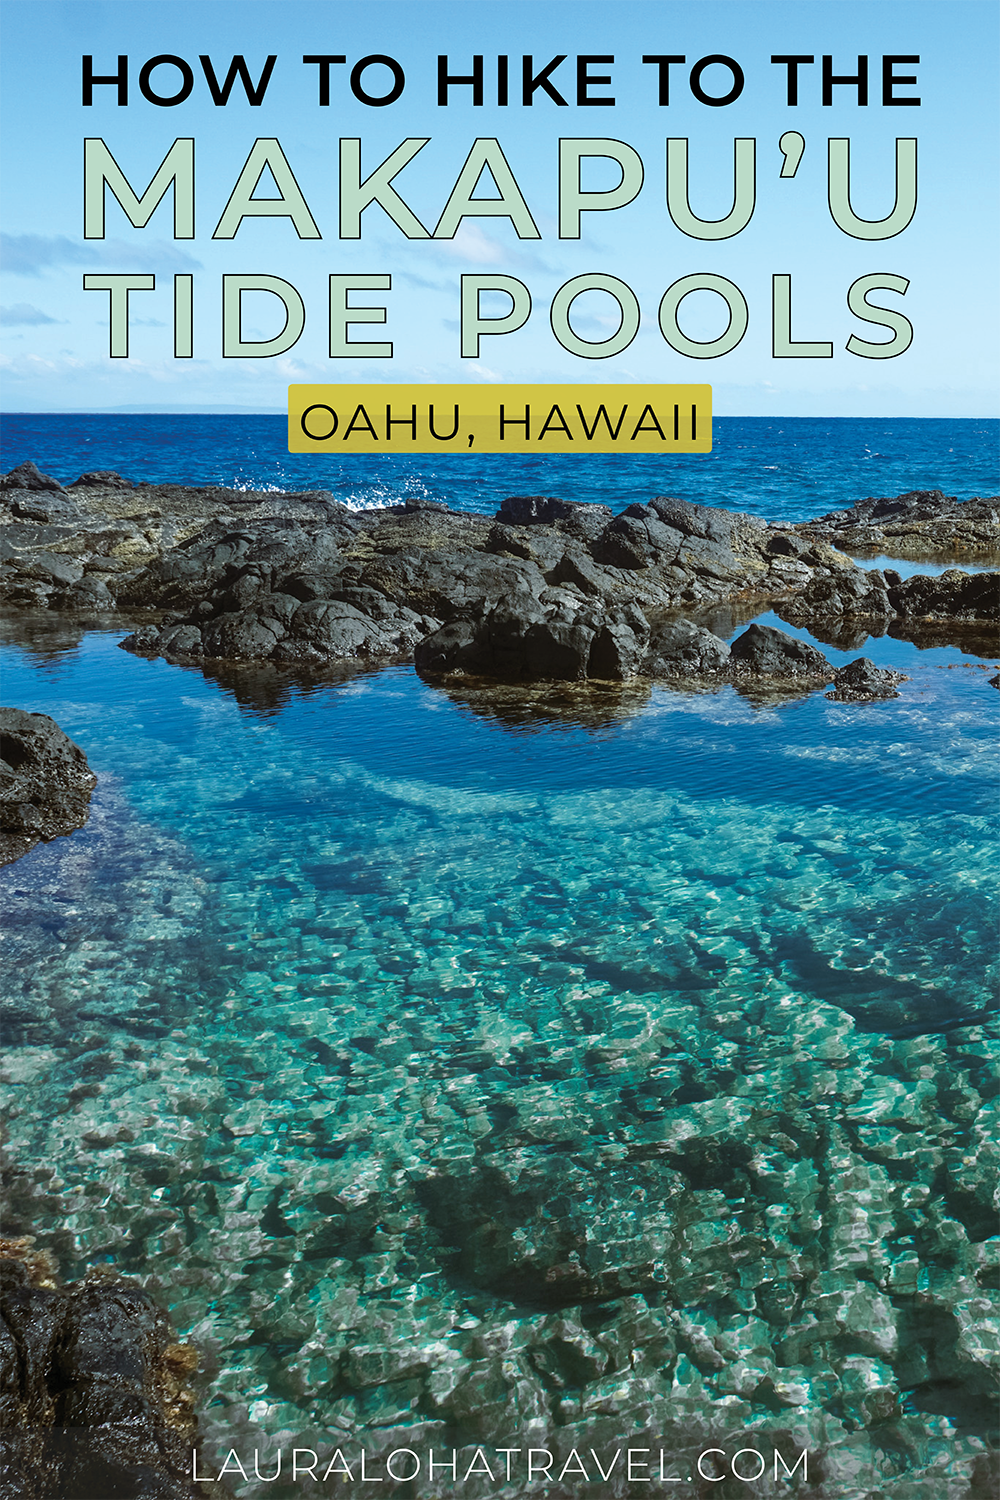
Hike Type: Out and Back (You’ll return the same way you came) 


Length: Approx. 2 miles round trip (up and down) with an elevation gain of 505 ft. It takes about an hour from the start of the Makapu’u Lighthouse Trail down to the tide pools. 

It is free to park and hike the Makapu’u Point Lighthouse Trail.

There are no bathrooms at the trail location, but there are facilities close by at Sandy Beach  (bathrooms and outdoor beach showers)

Makapu’u Point Lighthouse Trail is legal and maintained by the state of Hawaii. I do not think the state maintains the Makapu’u Tide Pools, but they are not illegal. The state urges people to stay out of the water due to dangerous shore break, so you will need to hike and swim in the pools at your own risk.

  • You will be scrambling down a cliff using a loose, rocky path to get to the tide pools. Getting up and down the mountain is the most challenging part of the overall hike.
  • There is little to no shade on the trail, so it is much hotter from late morning to early afternoon.
  • Rocks can be slippery from seaweed or algae. Lava rock is also usually sharp and jagged.
  • Use EXTREME caution in and around the water at the Tide Pools. There is often a dangerous shore break here. Large waves can break and sweep over rocks, flooding the pools unexpectedly. Many people have died from being swept out to sea.
  • Never turn your back to the ocean. This is the most important rule. Always keep an eye on the ocean waves and be vigilant about changing tides.
Makapuu Point Lighthouse Trail path with danger signs next to ocean

Parking & Location

Location:

The Makapu’u Point Lighthouse Trail starts at the main parking lot, located right off the Kalaniana’ole Highway on Oahu’s Southeast side in Waimanalo. Makapu’u Point is about a 30-minute drive from Waikiki.

Parking: 

The access road to the paved parking lot is gated and opens at 7:00 am. The Makapu’u Lighthouse Trail is great for sunrise, but I do not recommend hiking down to the tide pools this early since it is prettiest when the sun is shining overhead. 

Once the gate opens, you can drive up a short access road to reach the parking lot. Spaces are limited here and fill up very quickly, especially on weekends. It is not uncommon to see cars parallel parked alongside the access road spilling into the street outside the gate. Just make sure to obey all parking signs if you park alongside the Kalanianaole Hwy.

FAQs

What are tide pools?

Tide pools are depressions formed along the shoreline of rocky coasts that are filled with seawater that gets trapped in the pools as the tide recedes. The Makapu’u Tide Pools are situated at the base of the Kaiwi Coastline on the Southeast side of Oahu. The ocean surrounding the tide pools is deep and dangerously powerful. Stay out of the ocean here – it is not safe for swimming. 

When is the best time to go to the tide pools?

The most important thing to consider when planning your hike to the tide pools is the tide and ocean conditions. The best time to hike to the tide pools is during slack tide or low tide when the ocean is calmer. I would strongly advise against trying to swim in the pools during high tide. Being in and around the pools can be extremely dangerous and even fatal when ocean swells are large. Multiple people have died here after being swept out to sea. I have also gotten seriously injured at these tide pools, so I cannot stress enough how important it is to check the conditions before going!

Certain seasonal or weather conditions, such as storm surges, storm tides, and king tides can cause tides to become even more extreme than they usually are. Tides also change hourly, daily, and monthly, so it’s essential to check the conditions before exploring areas near the ocean. You can check ocean conditions using Tides Report, Surfline Surf Report, or by downloading an app called Tides Near Me.

Ideal weather: The tide pools look prettiest on bright sunny days since the light illuminates the clear blue water which looks dramatically breathtaking against the dark black lava rock. The pools won’t look as blue or clear on a cloudy or overcast day. 

The tide pools are still pretty on a cloudy day!

What do the different tides mean?

A slack tide happens in the hour preceding or following a high or low tide. Waves have shorter intervals, which are calmer and less dangerous. This is ideal for swimming in a tide pool, but slack tides usually only last for 20-30 minutes. It is best to visit Makapu’u when the tide is going out rather than in.

Dangerous for Tide Pools – The water level will be at its highest during this time, which means the pools are subject to flooding. Even if the pools seem calm and inviting, there’s a high chance rogue waves could come crashing over them. 

Low tide is safer to explore the tide pools since the ocean is typically calmer. Water levels will be lower, so the tide pools are less likely to flood. When looking at tide predictions, you’ll want to find numbers below zero. The lower the number, the lower the tide.

As a reminder, you will be swimming and exploring at your own risk! Hawaii’s weather and ocean patterns are often unpredictable and can change unexpectedly. Even the calmest days are not necessarily safe – always use caution!

What to Wear & What to Bring
  • Sunscreen – I love Sun Bum!
  • Water – I’ve recently started bringing an insulated bottle with me when I travel because nothing beats having ice cold water when you reach the top of a hike.
  • Sneakers
  • Wear comfy workout clothes for the hike
  • Wear a swimsuit underneath if you are planning to go in the tidepools
    • Bring a towel too!
  • A backpack so your hands are free – My favorite travel backpack is my Fjallraven Kanken Backpack since it is not only cute but also water-resistant!
  • Camera – I use the Sony A600

The Hike

How to find the Makapu’u Tide Pools
tide pools at makapuu in Oahu Hawaii

It will be easy to identify the Makapu’u Point Lighthouse Trail entrance as you make your way through the parking lot. The path is paved and straightforward to follow. It winds up the side of the mountain and offers beautiful views along the way. 

Makapu'u Point Lighthouse Trail aka Kaiwi Shoreline Trail

You’ll pass two rest stops before you get to a third where the tide pool trail is located (about ⅔ of the way up). Look for the rest area with informational signs about humpback whales. The tide pools are located along the shoreline at the base of the mountain.

Makapu'u Point Lighthouse Trail aka Kaiwi Shoreline Trail

Looking down at the 400ft of cliffside can be daunting, but you’ll come to find the challenge of hiking down is much more manageable than it appears. The tide pools are visible from the top of the trail, which will help you navigate the right direction to head in. 

Makapuu Tide Pool Hike - cliffside scramble

View from the top of the trail to the Makapu’u Tide Pools. It is rare to have the tide pools entirely to yourself. I guarantee you will see others hiking down or swimming during your trip.

Makapuu Tide Pools high tide flooding

Use caution if the tide pools look like this. When waves are flooding the pools and washing out the area, it is usually a sign that it is too dangerous to swim.

Makapuu Tide Pool Hike - cliffside scramble

View from the bottom of the trail to the Makapu’u Tide Pools

Look for rocks spray painted with white arrows to help guide you down the “easiest” path. These will be more helpful when climbing back up since they are harder to see on the way down. Don’t worry if you seem to stray from the marked trail – just focus on using good judgment and common sense to make your way down.

Makapuu Tide Pool Hike - cliffside scramble

Once you reach the tide pool area, find a safe, dry spot for any belongings you wish to put down. Wet rocks are a good indicator of where waves are crashing (or where the spray from the nearby blowhole reaches), so avoid being too close to any potential “splash zones.”

Blowhole at Makapuu, Oahu, Hawaii

There is also a cool blowhole in the rocky shoreline that sprays water high into the sky.

You’ll want to find the two larger pools, which are about 4-5 feet deep. I wouldn’t recommend diving, but you can certainly swim around in them! You may want to wear water shoes since the rocky bottom can be slimy or sharp.

Lauren swimming in tide pool at makapuu in Oahu Hawaii

Ocean Safety Disclaimer: Beach and ocean conditions can be extremely dangerous and certain activities may require a certain level of ability and skill. Always take proper safety precautions when near bodies of water and pay special attention to weather forecasts, tides, currents, and safety signage. Visit hioceansafety.com to view current wind & surf reports and additional safety information. As the trusty old saying goes: When in doubt, don’t go out! 

Second Trail Option: Alan Davis Beach & Pele’s Chair

There is a second trail option to get to the Makapu’u tide pools that is much more adventurous (and, albeit much more dangerous). This trail brings you around the mountain versus walking up the paved lighthouse path and scrambling down. 

Reference the map below to compare the two trails.


1. Green: Makapu’u Point Lighthouse Trail (described above)

2. Blue: Pele’s Chair / Alan Davis Beach Trail (described further below)

Map of Makapuu Parking on Oahu - LAURALOHA TRAVEL

Instead of starting on the paved lighthouse path, you’ll head to the right to find a dirt path that leads into the bushes. Continue on this path for 15 minutes until you reach Alan Davis Beach where a rock formation called Pele’s Chair is located.

Makapu'u Tide Pool Trail - Alan Davis Peles Chair

This trail leads to Alan Davis Beach and Pele’s Chair

To get to the tidepools from here, you have to wrap back along the coast to the left (in the direction of the parking lot but on the other side of the cliff). This will take you on a 45-minute hike along the shoreline. You’ll pass other secluded tide pools and rocky overhangs along the way. Eventually, you will reach the main tidepool area noted above. Since you will be tracing the shoreline, make sure the tides will remain low during the entire hike. If the tide is high or the ocean is rough, this path can be perilous since the route may become flooded.

My Terrifying Tide Pool Experience

I first hiked to the Makapu’u Tide Pools in 2017 with 3 friends. We took the second trail that passes Pele’s Chair and arrived at a stunning tide pool that was even prettier than the ones we intended to hike to. We decided to hang out here a bit since we had it all to ourselves. The water was seemingly calm and I couldn’t wait to jump in. One friend noticed an inflated inner tube tucked behind a rock against the mountain and made her way over to it. I was standing on the rocky edge between the pool and the ocean, facing the mountain, staring at the pool in awe. I couldn’t resist snapping a photo of this idyllic scene, so I unzipped my bag to take out my phone.

tide pools at makapuu in Oahu Hawaii

The moment I opened my camera app, a wave came out of nowhere and washed over the edge of the pool where the 3 of us were standing. We crouched down, trying to keep our balance as water flooded around us into the pool, bracing ourselves for the rest of the set. The next wave was bigger and heavier, and it knocked us into the tide pool. The friend who was investigating the inner tube said she turned around and we had disappeared.

I was extremely disoriented as I came up for air and opened my eyes. A layer of white foam covered the surface of the overflowing tide pool. I was relieved to see we were still in the pool and not in the open ocean. Items from my unzipped bag floated past me trapped in the current sucking the water back into the sea. I frantically grabbed what I could – a protein bar, a $0.99 water bottle, and my wallet. I then scrambled to get out of the pool, my hands, arms, and legs stinging after being dragged against the jagged lava rock. To make matters worse, I whacked my head pretty hard on the stone ceiling above the pool. 

We were lucky to all be okay with minor injuries and bloody scratches. Unfortunately, I let go of my phone as I was knocked into the pool. I had a glimmer of hope when we realized it was still ringing inside the waterproof case, but we had no luck trying to find it in or around the pool. It was gone along with all my photos from the past few weeks.

The tide was rising and the waves continued to crash onto the rocky shoreline we had just trekked across. We couldn’t go back the way we came, so we did our best to climb up and across the mountain, staying as far away as possible from the ocean’s edge. We finally made it back onto the lighthouse trail and made our way back to our mopeds. I have never felt so relieved to finish a hike. We celebrated surviving the tide pool fiasco with some much-deserved mochi ice cream from Bubbies in Hawaii Kai. 

My friend and I spent the next week aching and hurting, but I realize how much worse the outcome could have been. I’ve been back to the tide pools several times since. 


Learn from my mistakes! Check the tides – high tides could mean you get stranded); Never turn your back to the ocean – you never know when a rogue wave will hit; and back up your phone! 🙂

The Hike Back

To get back onto the main paved trail you will have to hike back up the mountainside the way you came down. The white arrow markers are helpful if you can spot them. Once you reach the rest area, you can continue up to see the lighthouse and gorgeous views at the top of the Makapu’u Point trail or head back down to the parking lot. 

Makapuu Tide Pool Hike - cliffside scramble
Makapu'u Point Lighthouse Trail aka Kaiwi Shoreline Trail

MORE TO SEE NEARBY: Just a few minutes away in Hawaii Kai is a fantastic coffee shop called Island Brew Coffeehouse. Stop for breakfast after a morning hike, or grab a coffee on your way!

Pin this post for later:

Beautiful crystal clear natural swimming tide pools - Makapuu Oahu Hawaii - Pinterest

More to do and see nearby:

About Laur

Aloha, I’m Lauren! One of my favorite things to do is explore the Hawaiian island of Oahu and nothing makes me happier than sharing what I’ve learned over the past 7 years with those planning their own adventures. I started Lauraloha Travel to help you enjoy every minute of your experience from planning all the way to paradise. Mahalo for exploring with me!

Keep Exploring!

Categories
Search

Affiliate Disclosure

Some posts may contain affiliate links that when used, generate a small commission for LaurAloha Travel at no additional cost to you. In fact, some links may actually provide a discount! Our top priority is to make your planning and travel experiences as seamless as possible, so any product or service promoted through this platform (sponsored or not) is carefully chosen to do just that. Affiliate links and sponsored content allow us to continue helping people like you plan amazing experiences. We are endlessly grateful for your support and hope you find value in all of our recommendations! Learn more here »

Social Media

Get The Latest Updates

Subscribe To Our Newsletter

Sign up to receive updates about new posts, travel tips, and product recommendations!

Save this post:

Share this post:

Keep Exploring

Recent Posts